
Classic (Square Knot) Double Column
By Lazarus Redmayne
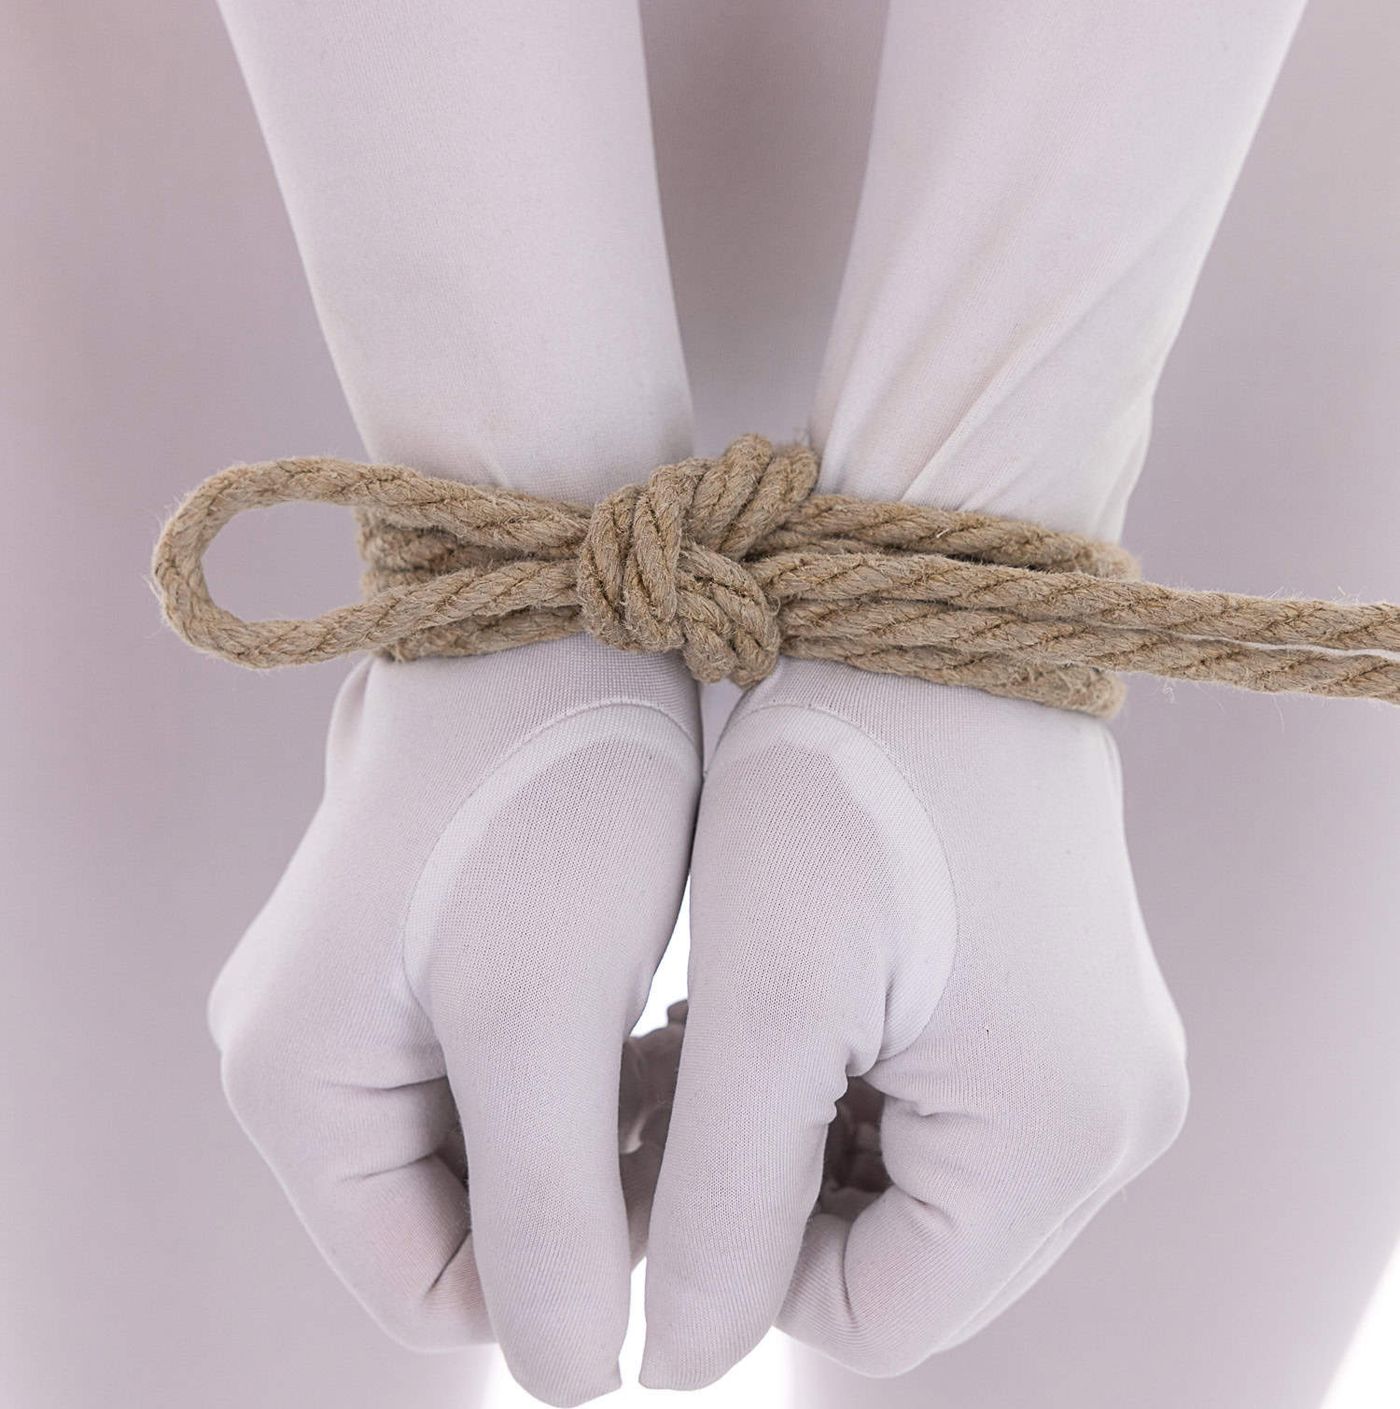
When a rigger says “Double Column” without further specification, such as “Lark’s Head Double Column,” this is probably what they are talking about (or they are saying that you can use any Double Column you like).
This is a very quick and intuitive method of tying a forward-tension Double Column, using a variation on a Square Knot or Granny Knot. This version is commonly used in classical shibari.
Risk Management and Safety
See Reducing Risk for important safety information about tying the wrists.
This knot is not as stable as the other options and can collapse if not properly formed or if too much tension is put on the knot without reinforcing it.
Rope Needed
For this tutorial, I used one 10' (~3m) piece of Natural 1/4" (6mm) hemp
I use an amazing Natural hemp rope provided by my affiliate Twisted Monk. Check them out!
Prerequisites

The Core Technique
For this example, we will tie the wrists.
Begin with your rope folded in half. Hold the rope in your guiding hand while your active hand lays the bight, on top of what you are tying.
Make two to three wraps for a total of four to six strands in the cuff. You will need a longer bight than you had for the Classic Single Column, roughly 10 to 14 inches, to have enough to finish the tie.
Keep a grip on all the strands with your guiding hand and use your active hand to lay the bight end over top of all of them…
…then wrap between the two columns, all the way to the other side.
Bring the bight around all the lines and back up to where you started.
Now we need to lock the cuff. First, reverse the direction of the tail to make a bend in the rope. (This, along with the crossing in Steps 4-5, creates the first twist of the Square Knot.)
Pull the bight straight up to begin cinching the lines of the cuff. This will tighten all the strands at the same time and to the same level.
Lay the bight on top of the bend in the tail.
Reach through the bend and hook the bight.
Pull the bight through. This is the second twist of the Square Knot.
If you have tied it correctly, you will have this distinctive shape with three lobes.
Confirm the cuffs are at the desired level of tightness. You need to be able to get two fingers under the cuffs. If not, it is too tight, and you risk impacting blood flow or causing nerve damage.
Tighten the knot very tightly as shown in the Single Column tutorial, Steps 22-30.
You will know you have the Square Knot version if you see this pattern with three sets of two lines converging and the tail and bight being parallel to the cuffs. If the tail and bight are perpendicular to the cuffs, you have made the Granny Knot version. Both can work fine if properly tightened, but the Granny Knot version is a little more prone to collapsing than the Square Knot version.
It is better to have the cuffs a little higher on the wrists so they do not impact the small bones of the wrists. The rope may have naturally migrated tight up to the hand while tying. If so, place your fingers inside the cuff and move them away slightly.
This way the pressure is not directly on the bones and other sensitive areas of the most vulnerable part of the wrist.
A Word of Caution
If strong tension is added perpendicular to the cuffs (I am pulling straight up on the tail)…
…this knot will deform and can either untie or result in this becoming a collapsing tie.
If you plan to have the tail in this configuration, use the load-bearing technique (p. 248) or reinforce the knot as shown on the next page.
Reinforcing the Knot - Making the tie more stable
The lack of stability in this tie can be a feature! This allows it to be rapidly untied.
Grab the tail.
Give it a twist to create a loop. Do this so that the lines of the tail lay parallel to the lines of the cuffs.
Reach through that loop and grab the bight.
Pull the bight all the way through. Now that that loop is around something, it is a Hitch. That is why this technique is often called “dropping a hitch.”
Pull the tail and bight away from each other very firmly. Then tighten each individual strand as shown in the Single Column tutorial, Steps 22-30.
Now, if tension is added, the first twist may deform somewhat, but it protects the second and third twists from deforming.
Rapidly Untying this Double Column
Add an additional twist so that you have a full Square Knot above the cuffs.
(This technique can also be used to create the second twist when doing the original tie in steps 7-12.)
See how the tail of the knot is naturally flowing in this direction?
To quickly release or pop this knot, pull the rope in the opposite direction…
…then pull firmly.
The knot will pop loose.
Then you can untie it easily from there.
Comments
Loading comments...
Sign in to leave a comment.