
Bunny Ties
By Lazarus Redmayne
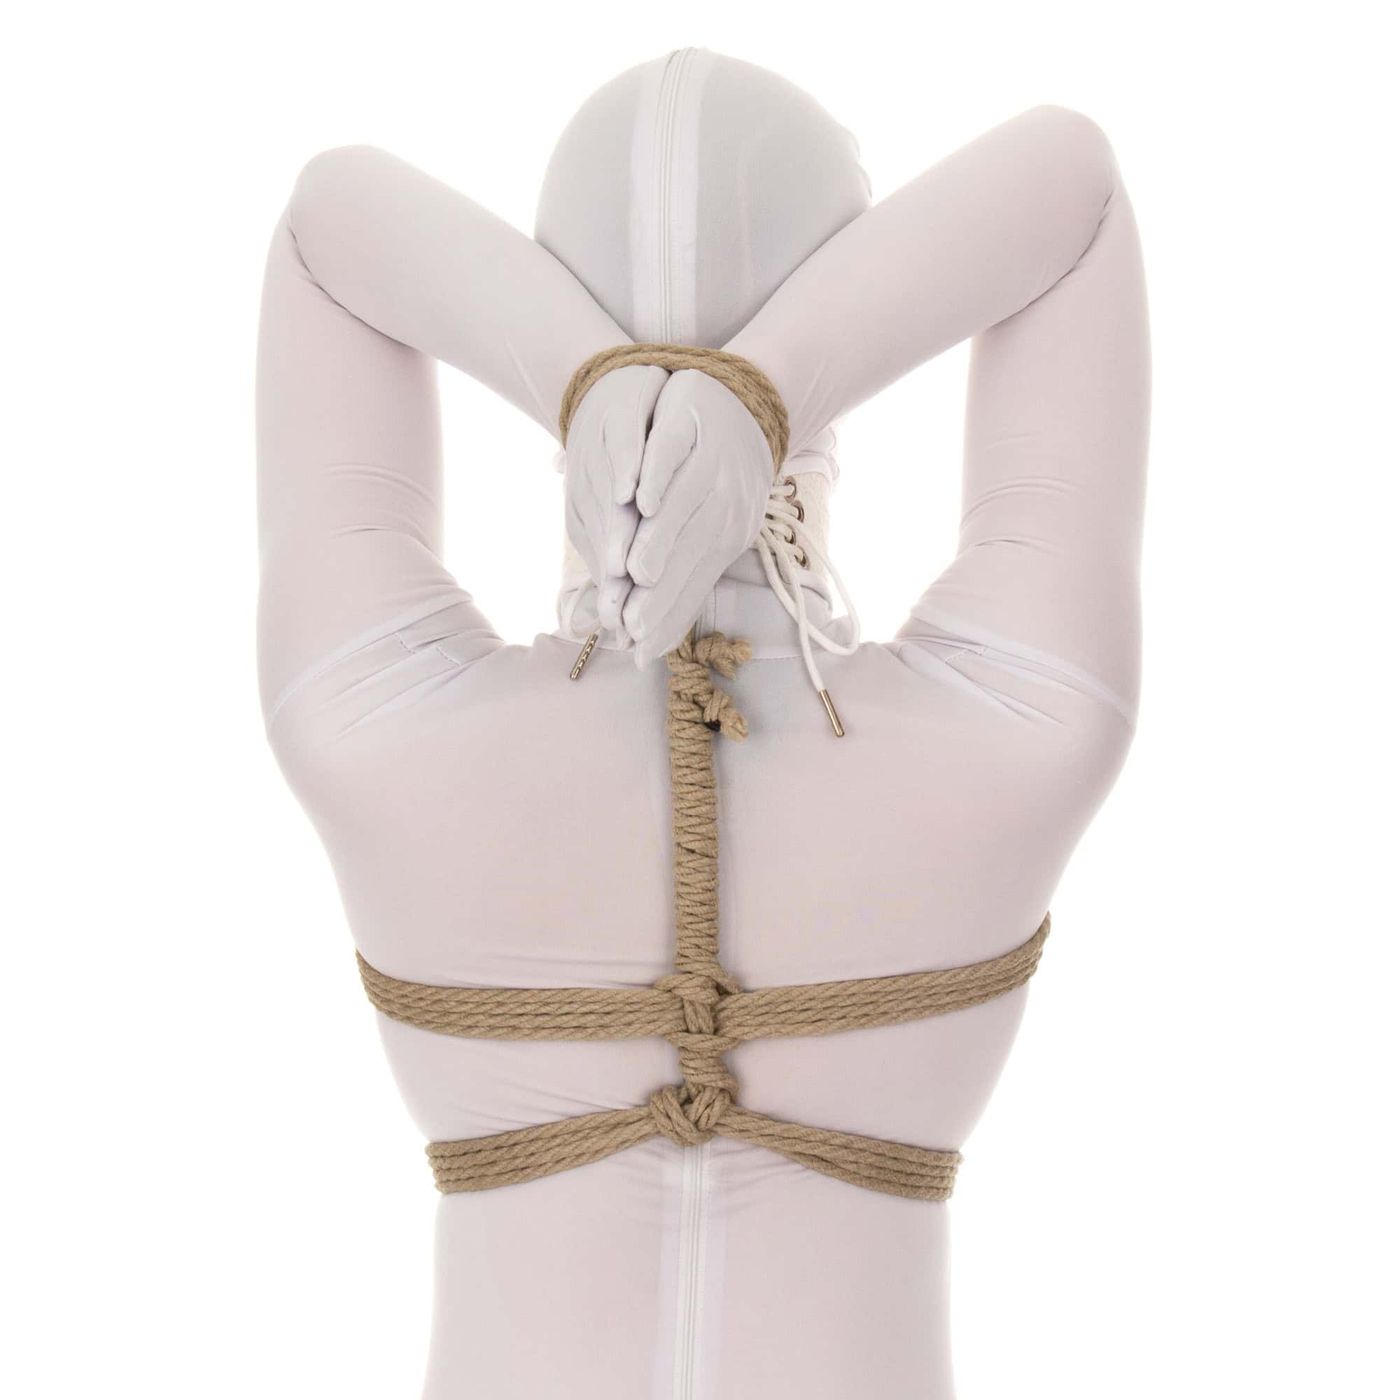
The Bunny Tie, also known as the Pillow Tie and by other names, is when the wrists are tied together in front of the body and then moved up over the head to a position behind the head or behind the neck, and held in that position in some fashion. There are many ways to achieve this; this tutorial shows two of the most straight-forward.
One interesting thing about this tie is that it can be relatively forgiving and comfortable or it can be made extremely challenging and strict! It all depends on how flexible your partner is and how far down their back you pull their wrists.
Risk Management and Safety
- This position can be very stressful for some. As always, test things out with your partner to learn their limits. Keep good communication open. Do not leave your partner in this position for too long the first few times you try this position. It may seem relatively comfortable at first, but the stress can build over time.
- Wrists: Care must be taken to not allow bulky knots on the inside of the wrist. Tie the cuffs more loosely than you normally would to allow space for adjustment as you shift your partner into the final position.
- Neck: This position can move your partner’s neck and/or lower-back into positions that are not normal. This adds to the stress of this position and can cause pain in places that are not even being touched by rope.
Rope Needed
This tutorial features Natural 1/4" (6mm) hemp. It uses one 30' (~9m) piece for Version 1, and one 10' (~3m) + one 15' (~5m) piece for Version 2.
I use an amazing Natural hemp rope provided by my affiliate Twisted Monk. Check them out!
Prerequisites


Video
Video Contents:
- Version 1 – Using a Lark’s Head Single Column (0:19)
- Version 2 – Using a Load-bearing Double Column (6:19)
- Artist’s Corner (8:42)
The Position Itself – Considerations and Risks
The position is simple, but it is not something that everyone can do. There are things you can do to control how challenging it will be.
Your partner’s wrists will be tied together somehow.
Simply have them lift their arms up and back…
…placing their wrists behind their head or neck.
It is common for a person to not be able to go too far. Work within your partner’s limits.
Note this: When their wrists are behind their head, they will naturally be at an angle like this. This is why you need to tie the wrists more loosely than normal. If not, the rope around the wrists will be too tight once they get into this position.
If you want to increase the challenge (and discomfort) of this tie, position the wrist farther down the back, and the elbows closer together.
Safety Note: If you make this more strict by only pulling on the tail, the tension in the wrist cuff will increase significantly. It is easy to make it too much. You can alleviate this by adding a strap around the elbows to hold them together. That strap will then do much of the work and you don’t need nearly as much tension on the wrists to hold them in place. This tutorial does not show this variant. That will be the subject of a forthcoming tutorial.
Bunny Tie, Version 1 – Using a Lark’s Head Single Column
The most straight-forward version of this tie begins with a Lark’s Head Single Column, brings the wrists into position and then ties the tail into a chest harness to keep the wrists in place. This version trades a little security for the benefit of not having any rope against the insides of the wrists as those wrists are being held in a stressful position.
Begin with a Lark’s Head Single Column around both wrists.
We specifically like the Lark’s Head Single Column for this because the tail runs smoothly and compactly out of the knot in the direction of the fingers. Because of this arrangement, it does not deform the cuffs when tension is added. If the tail does not run out of the knot like this, it may tend to twist the ropes of the cuff when pulled. This twisting tightens the cuffs around the wrist more than originally tied, which can lead to injury.
Be sure to tie this cuff more loosely than you might normally. Your partner’s wrists should be far enough apart that you can slide a finger between them.
Bring your partner’s wrists up over their head…
…to the back of the head or neck.
This is the position.
Now you just need to secure the tail. If you already have a chest harness or waist harness in place, you can simply tie the tail to it. If not, you can use the tail to create a chest harness.
If you know how to tie a Gote Shibari or a TK, the rest of this tutorial is going to do that same thing, but upside down.
Bring the tail around your partner’s lower chest (at the sternum level or below the breasts).
Do the second wrap above the first.
Reach under the stem to hook the tail of the second wrap.
Pull the tail through and reverse tension.
Bring the tail down over top of the lower chest strap.
Reach under the lower chest strap from above on that same side and hook the tail.
Pull the tail up under the strap and through.
Reverse tension again, placing the tail in the opposite quadrant.
Again, reach under the lower chest strap from above on that same side and hook the tail.
Pull the tail up under the strap and through. Run your fingers under that strap to make sure the lines are all nicely parallel and smooth.
Now, if you were using a shorter rope and happened to nearly be out of rope at this point, you could just lock off your rope now and be done!
… But I happen to have enough rope left to make another strap, so that is how I will choose to use it up.
Wrap the tail around the stem once or twice to get some separation (and to better hold the X-friction on your first strap in place while you continue tying).
Wrap the tail around your partner’s upper chest.
When you get to the stem, go underneath it.
Do a second wrap, keeping your strand parallel and at the same level of tension.
When you get to the stem, go underneath it.
Pull the tail through…
…then reverse tension over the stem. We will now lock this new strap in place with a Square Lashing, also called a Half-moon Friction (although it is really Two Half-moon Frictions).
Reach under the upper chest strap from below and hook the tail.
Pull it down and through.
Lay it on top of the stem. Pull it hard to set the tension in the first side of the friction. Reach under the upper chest strap on that side from above and hook the tail.
Pull the tail up and through.
Pull it hard to set the tension in the second side of the friction.
Here I am holding the ropes of the friction while I tighten it.
Lay the tail over top of the stem, then reach under the stem to hook the tail.
Pull the tail under the stem and through. Use up the remaining rope in whatever way you wish.
You could use it up below the straps for a more secure approach. That will add bulk, however.
Another choice is to use it up by wrapping it around the stem. This is marginally less secure, but also less bulky. Depending on what you are doing, this may look better in pictures. Either approach is fine.
I chose to wrap it up the stem and then tuck my knotted ends between the strands to lock it off.
Done!
Artist's Corner - Version 1
Bunny Tie, Version 2 – Using a Load-bearing Double Column
If you find your partner able to wriggle out of the Single Column approach, or if you just want to add that additional level of security, you can start this tie with a Load-bearing Double Column instead.
This version adds security, but with the trade-off that you now have rope against the wrists. This can be managed but take extra care to have both you and your partner doing their finger checks. Direct them to tell you if they feel anything weird.
Add a Double Column to your partner’s wrists.
Here I have chosen the Wrap & Cinch Double Column as it is the least bulky.
Tie it a little more loosely than you normally would. Make sure there’s enough space between the wrists that you can slide your fingers between the skin of the wrists and the cinch.
A new rope.
Slide the bight of a new rope between the wrists and the cinch on one side of the cuff.
Reverse the direction of your rope and bring the bight back through the cuffs on the other side of the cinch.
Bring the tail through the bight.
Tighten the Lark’s Head around the cinch. You now have a Load-bearing Double Column.
Position your partner.
Set the tension you want.
Tie off as discussed in Version 1 above. When I added my rope (Step 3 above), I chose a shorter rope.
This means I have enough to create one strap around my partner’s lower chest but not two. This is entirely fine and makes for an attractive, minimalist version of this tie.
Use up the remainder of your rope however you wish. As above, I chose to wrap it around the stem and tuck the knotted ends in between the strands to lock off.
Done!
Artist's Corner - Version 2
Adding to the tie…
You can add more challenge and security to this tie in many ways. Here is an Artist’s Corner showing an additional strap added around the arms and head, going through the mouth. This strap is Triple-Column style – That is to say that a single strap is placed around the arms and head, but then cinches are added to both sides to seat the rope more firmly into the mouth and to keep your partner from being able to move the strap.
Comments
Loading comments...
Sign in to leave a comment.