
Trefoil Medallion
By Lazarus Redmayne
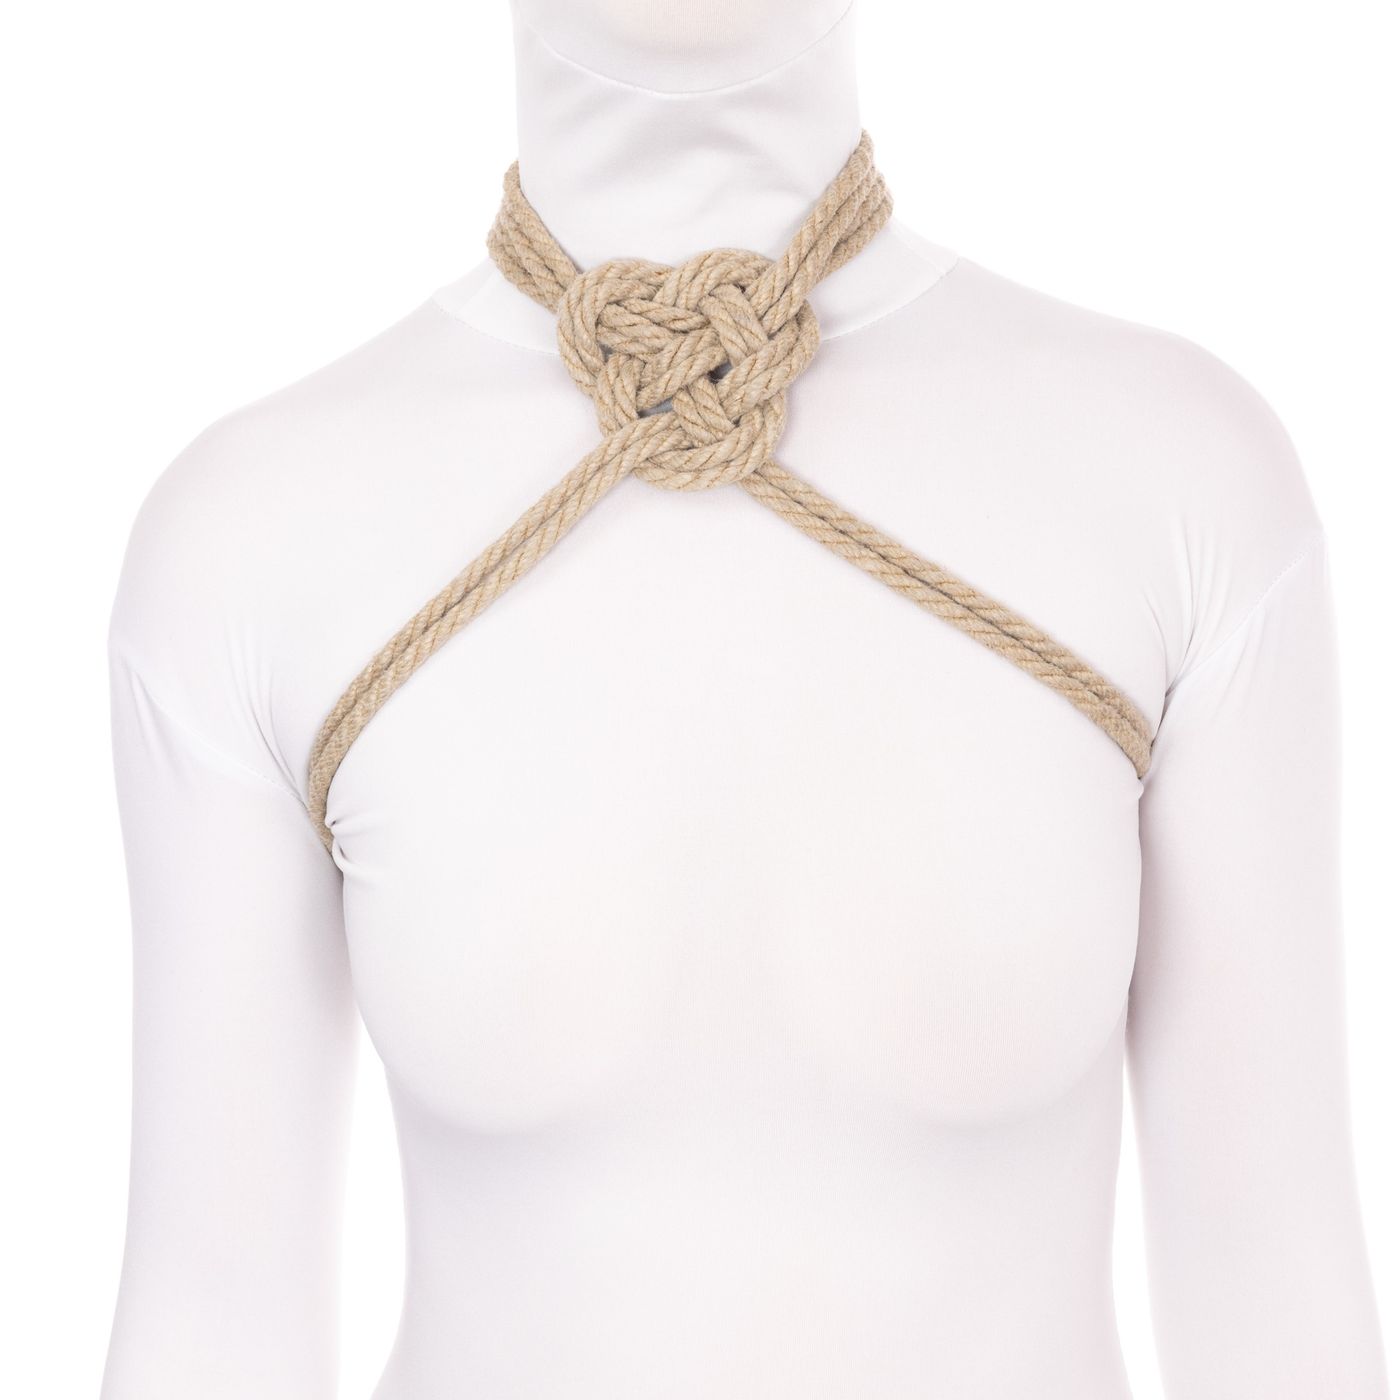
This lovely, flat decorative knot brings lines together on one side and distributes them at an angle on the other. It can be used as a decorative crossing hitch if the ropes are not under too much tension. It can be done with a single rope folded in half, or with two or three ropes in parallel, which would allow you to explore varying colors!
This tutorial was inspired by a question that came from one of our members. (Thanks, ‘T’!) They had seen a very cool picture featuring a choker with a pattern on it that turned out to be a Double Coin Knot tied in a creative way. The Double Coin Knot has features similar to this, but only has 2 lobes. This is an extension of that idea, reworked to have three interwoven lobes!
A trefoil (from Latin trifolium 'three-leaved plant') is a graphic form composed of the outline of three overlapping rings. It was commonly used in gothic architecture, and carries both Pagan and Christian symbolism. <insert trefoil graphic>
Here are some examples of what you can do with this. See the Cool Examples! Section below for a more detailed look and creative inspiration!
Risk Management and Safety
This is neck rope. Many people love neck rope, but it is outside the risk profile of many others. Be sure to talk about it with your partner before attempting any type of neck rope. Obviously do not tie this too tightly.
As always, have a means to cut rope immediately on your person or in arm’s reach whenever you tie, but particularly when incorporating higher risk elements like neck rope in your scene. A quality pair of EMT shears or an EMT hook is what most riggers recommend.
Rope Needed
For this tutorial, I used two 30' (~9m), two 15' (~5m) and two 10' (~3m) pieces of Natural 1/4" (6mm) hemp. Extend your rope if you need more; use it up if you have too much.
I use an amazing Natural hemp rope provided by my affiliate Twisted Monk. Check them out!
Video
Video Contents:
- Setup – Finding the Offset Bight (0:17)
Halter and Choker Configurations
- Beginning Version 1: Halter Configuration (1:25)
- Beginning Version 2: Choker Configuration (1:47)
- Beginning Version 3: In-line (2:19)
- Tying the Trefoil Medallion – Core Technique (2:48)
Collar Configuration – Tying the Trefoil Medallion on a Double Wrap
- Beginning Version 1: Starting with the Offset Bight (5:50)
- Beginning Version 2: In-line (6:20)
- Tying the Trefoil Medallion in Collar Configuration (7:08)
---
- Cool Examples! (9:02)
Setup – Find the new location for the bight, the “Offset Bight”
If using a single rope, hold both the primary bight and the tails in one hand and run a finger from your other hand between them until…
…you find the mid-point between them.
This is a secondary bight, but because we do all the tying using only the tail on one side, this is *not* the place we are going to begin our tie.
We need to move to a point equal to the amount of rope the knot will consume. The hand on the right side of this picture is holding the secondary bight and the hand on the left side is holding that point. With 6mm (1/4”) rope, the Trefoil Medalion consumes ~28cm (15”), so that is how far away from the second bight this point is. This is the Offset bight and will be our starting point.
If you use a different diameter of rope or tie your Medallion looser or tighter than I do, it will consume a different amount of rope. To determine how much you need, tie one first, mark the beginning and end, then measure how much rope was consumed.
Trefoil Medallion – Core Technique, Halter and Choker Configurations
Beginning Version 1: Halter Configuration
Simply drape lines around the back of the neck and over the shoulder.
Place the Offset Bight at the middle of the back of the neck.
Beginning Version 2: Choker Configuration
Place the Offset Bight at the middle of the throat with the longer end on the *left*, then…
(Optional) Add a decorative knot here at the Offset Bight, perhaps a Figure-8 Knot. See “Cool Examples!” for a picture of this option.
…cross the lines behind the neck…
…so that both ends are *below* the first wrap, then…
(Optional) Instead of simply crossing them, you could connect them with a Square Knot or Double Coin Knot. See “Cool Examples!” for a picture of this option.
…bring them to the front, laying the longer line (the right-hand line in this example) on top of the shorter line. This is the Choker configuration.
Beginning Version 3: In-line
As you will learn below, almost all the action in this knot is tied with only one side. This means that you can also start with the rope coming in from one side…
…going around the back of the neck…
…to the front. If you want a Halter effect, lay the tail on top of the existing line, then begin tying the medallion.
If you want a Choker, go around the neck again, starting above the first wrap…
…going to the back, crossing over the first wrap, then…
…continuing to the front with the tail now below the first wrap. Lay the tail on top of the existing line.
Tying the Trefoil Medallion – Core Technique
Lay the shorter line (the left line in this example) down against the skin.
You won’t be doing much else with this, all the rest of the action happens with the other line.
Choose where you want the Medallion to be and lay the longer line (the right line in this example) on top of the shorter one at that point.
You could do this closer to the neck or further down… (Or some other place entirely! Hip harness perhaps?)
Run the longer line in a circle, laying it on top of itself to create a loop. Position the loop so it lays on top of the shorter line.
Continue working with the longer line. Continue the current curve, laying it on top of the shorter line.
Now weave it through the loop, following this path. Over itself, under the shorter line, over itself.
Like this.
This creates the upper-left lobe of the Trefoil.
Don’t pull it all the way tight. Leave a little space here. This will become the lower lobe of the Trefoil.
Run the longer line under the incoming line on the right side.
This creates the upper-right lobe of the Trefoil.
Next you will weave it through the lower lobe, following this path.
Like this.
Tighten and work the knot to complete the Medallion.
If you want to reposition the Medallion, you can do so easily as it can slide back and forth on the shorter line.
Here I want to move it closer to the neck. I grab the Medallion with one hand and the shorter line in the other, then…
…simply slide the Medallion up, then…
…reposition it.
Done!
Trefoil Medallion on a Double Wrap – Collar Configuration
Learn the core technique above first. This is a modification that incorporates the first wrap into the Trefoil itself.
Beginning Version 1: Starting with the Offset Bight
Place the Offset Bight at the middle of the throat with the longer end on the *left*.
Wrap both ends around to the back. On the back, cross the lines going *upward* so that the ends are both *above* the first wrap.
Bring the lines to the front, keeping them above the first wrap.
Lay the left side down first, crossing over the first wrap a little to the left of center.
Lay the right side down, crossing over the first wrap a little to the right of center, and laying it on top of the left line.
Beginning Version 2: In-line
This version can also be tied in-line.
Start with the rope coming in from one side.
Go around the back of the neck.
On the front, begin the second wrap by running the lines *under* the first wrap.
This place the tail below first wrap as you begin the second wrap.
Wrap the tail around to the back, where you…
…cross it over the first wrap so at the second wrap is snow *above* the first as you continue your second wrap to bring it to the front.
Lay the right side down, crossing over the first wrap a little to the right of center, and laying it on top of the left line.
Tying the Trefoil Medallion in Collar Configuration
Run the right line in a circle, laying it on top of itself to create a loop. Position the loop so it lays on top of the left line, where the left line and the first wrap come together.
Continue working with the right line. Weave it through the loop. Over itself, under the grouping of rope comprised of the left line AND the first wrap, then over itself. Following this path.
Like this. As you can see, this creates the upper-right lobe.
Don’t pull it all the way tight. Leave a little space where I am pointing. This will become the lower lobe of the Trefoil.
Run the under the group of ropes comprised of the right line and the first wrap. This creates the upper-right lobe of the Trefoil.
Weave the tail through the lower lobe following this path. Over, under, over.
Tighten and work the knot to complete the Medallion.
Done!
Cool Variations!
For these examples, I used MFP (multifilament polypropylene), provided by my affiliate AgreeableAgony.com. MFP is great stuff! It is soft, strong, waterproof and machine washable. The colors don’t bleed or fade. If you are in the market for colored rope, check out AgAg! If you use this link, it will give you 5% off orders over $35.
Halter Version
Halter Version, double strand, same color
Halter Version, double strand, different colors
Choker version, triple strand, different colors
Choker version, triple strand, different colors
You are not limited to simply crossing the lines in the back. You can do other creative things like interweave them!
Like this.
Ornamental Evolving Choker
Start with a Figure 8 Knot at the throat.
Add a Double Coin Knot at the back of the neck
Reposition the tails so that the run back to the front, below the first wrap
Add a Trefoil Medallion to the upper chest
Pose!
Comments
Loading comments...
Sign in to leave a comment.