
Tidefall, by GodlyMana
By Lazarus Redmayne
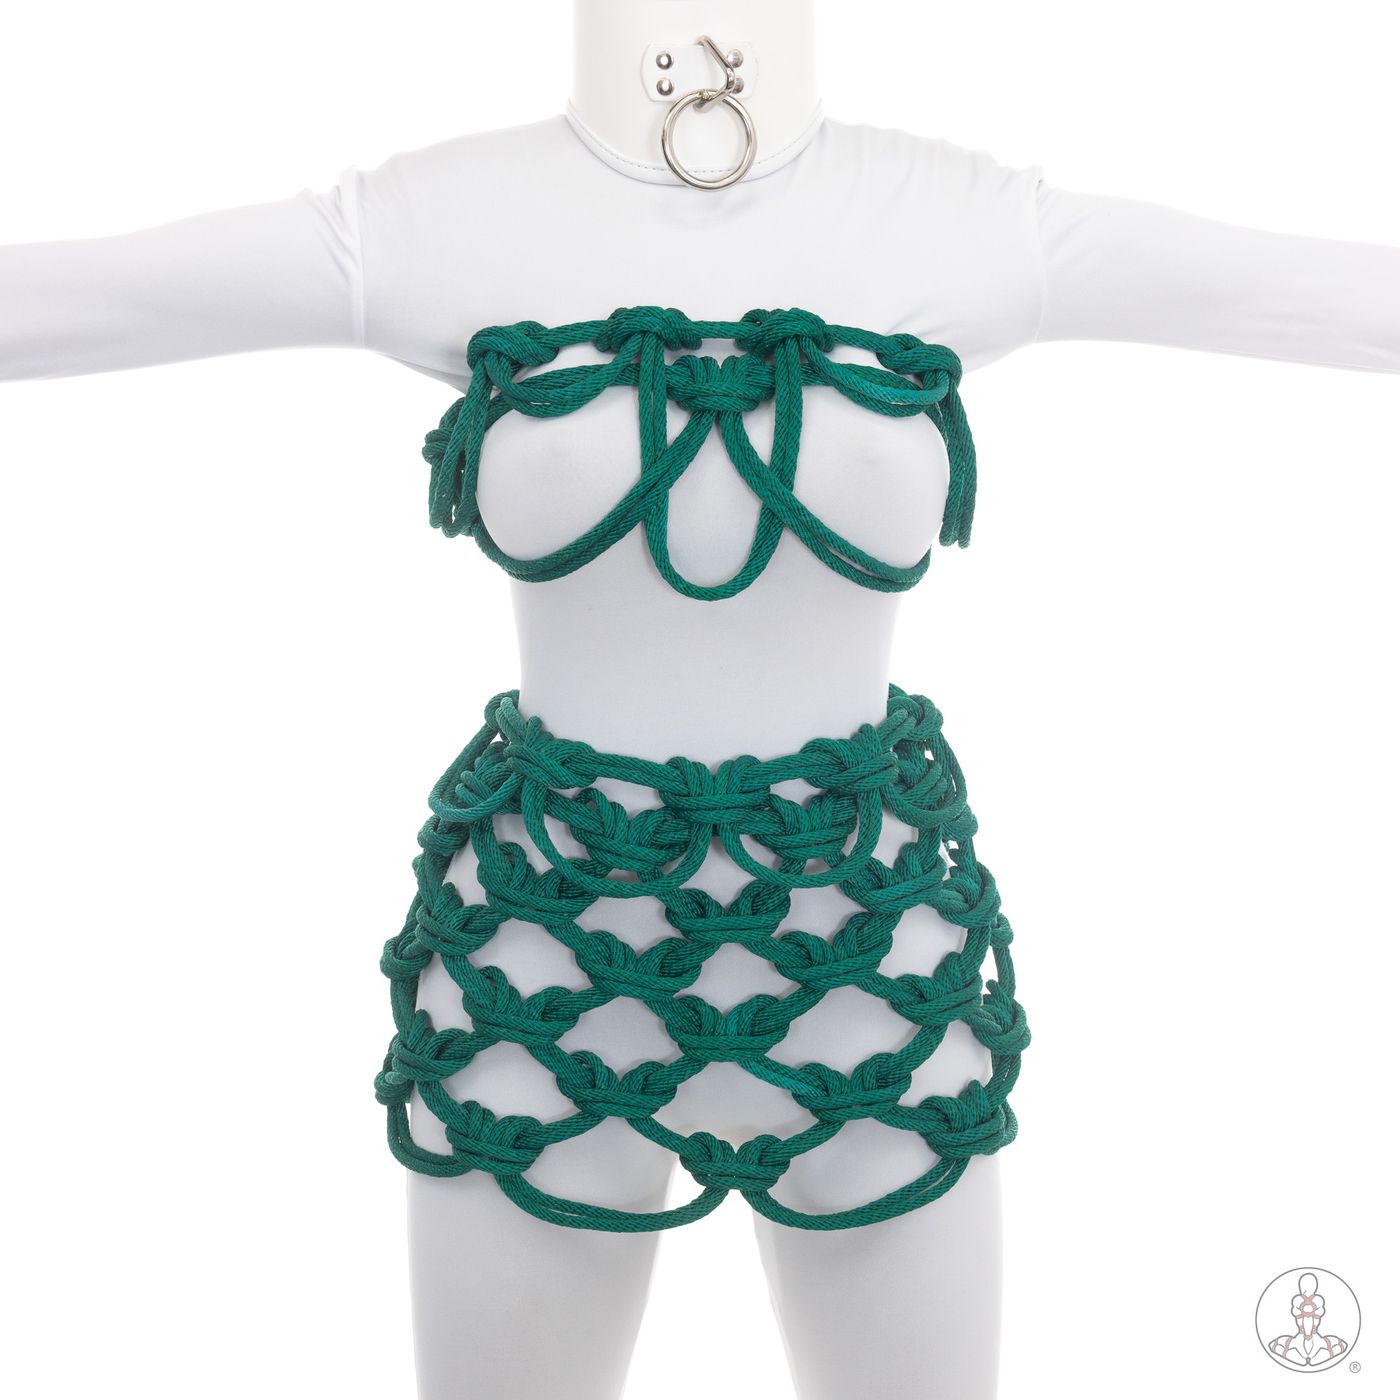
This is the official tutorial showing how to create “Tidefall” by GodlyMana. You can see his original post and more of his wonderfully creative work on FetLife and Instagram.
It was this dress that was the original inspiration for the Imbricated Outfit Toolkit, a mini-course that gives you the tools to create not only this design, but others of almost unlimited variations! I explain all these techniques in detail in the IOTK tutorial, so in this one I’m just going to talk about them at a high level. If you find yourself need more detail, these are the IOTK elements that are used in ‘Tidefall’:
- Using the incredibly time-saving quick-release feature (creating it) (demonstrating it)…
- …implemented using the single-wrap quick-release frame
- The 7th pattern in many. variations.
- Adding the second row using the Row 2+, Option 1 – Add a new frame line technique
I have also included another useful trick!
Heavily decorative ties like this are particularly fun when doing rope specifically for photography. And in such cases, it is common to want to minimize the number of rope extensions or joins, so that’s all parts of the tie look as good as they can. But for anyone who’s worked with Cow Hitches in the past, you know how long it can take to do three tail pulls for every Cow Hitch, especially with a long rope. In shooting this tutorial, I wanted no joins, so I worked with extremely long pieces of rope … 120’ (~36m) for the skirt! Without this special trick it would’ve taken hours to tie this, although to be fair, it still took almost an hour!
Variations
A couple of differences between GodlyMana’s original design and what you will see below:
- He used longer drapes for the skirt than I did. This means mine looks a bit more like a miniskirt, whereas his is more full-length.
- This means the Cow Hitches look different because of how easily his rope conforms to tight turns, whereas mine resists them.
- He arranged the lines of the drapes between Cow Hitches so that they lay above and below each other instead of slightly behind each other like I do. I love the way he did it; it has a very attractive effect. One thing to keep in mind if doing it that way is that it consumes rope at different rates even more than the way I did it, so the trick I talk about in steps 1-4 of this section in IOTK -- changing which line runs on the outside when you move from one row to the next -- becomes much more important.
These are just a few examples of the different creative choices you can make with the IOTK!
Rope Needed
- Chest: One 40’ (~12m) rope … although I used about 80’ (~24m) in case I needed more!
- Hips: One 120’ (~36m) rope
The Inspiration!
This inspiring design was developed by GodlyMana. Find more of his wonderfully creative work on FetLife and Instagram!
Tying with very long ropes
If you have enough space to do so, you can shorten the tail bight chains teaching it first. This technique would not work in all cases, but it works well in this case because we’re not trying to do tail pulls through any very tight spaces.
Here I have 80’ of rope to create the top of Tidefall.
(Turns out I did not need nearly that much, but I use 120’ for the skirt!)
Find the bight.
Mark the bight with a slip knot so it doesn’t get lost.
Go to the other end and make the tails even.
Create a slip knot.
Reached through the loop of the first slipknot, grab the tail and pull another small loop through. This begins the chain stitch.
Continue to chain stitch until you’re almost at the bight.
Put something through the last loop of the chain stitch so it doesn’t unravel before you are ready.
You’re now ready to tie.
'Tidefall' Top
(Optional) If using a long rope as I did, prepare it by Chain-Stitching it as shown above.
Create a quick-release frame line using a Sheet Bend.
Add another wrap quite close to the first one.
Run the tail under itself.
Working with a Chain-Stitched tail, you will periodically need to release some of the chain stitch so you have enough rope to work with. I used a carabiner to keep my Chain Stitch from unraveling before I was ready. When this happens, unhook the carabiner…
…release a few links of the rope, and hook the carabiner back in at a lower point.
Now continue to create your Cow Hitch as normal, just managing this more bulky form of the tail. Here I am running its on top of and then behind the upper line…
…
Tightening it completes the first half of the Cow Hitch.
Now run the tail behind the upper line…
…and down through the loop that you’ve created, then tighten to create the second half of the Cow Hitch.
Repeat steps 6-10 to create additional Cow Hitches as needed. Here I have added another one quite close to the first.
When you need more rope, release more from the Chain Stitch.
Make to the drape of my second Cow Hitch a little larger than the first…
…and the third a little larger than the second.
On the front, make the drapes be smaller above the breasts…
Larger between the breasts (but with the same spacing between the Cow Hitches)…
And smaller above the other breast again (same size as above the other).
Then continue tour the back again…
…making the drapes on each side symmetrical…
…
Find the second frame line and..
Connect to it with a Cow Hitch.
Now begin creating Cow Hitches for the next row. You’ll make 2 or 3 coming from the back to the side. To make the style of top, you will want a Cow Hitch right at the side where the breast attaches to the chest.
Run the tail along the breast to create visual separation…
…
Lay the tail on top of the drape from the first row and then create a Cow Hitch right in the middle.
Repeat the pattern on the other side…
…
This completes the top part of Tidefall.
I have quite a lot of rope left over. I’m just going to hang it here for the moment while I do the skirt and then decide if I want to add more detail to the top. Alternatively, you could run this line from the top down to the hips and begin creating some waist or hip element there.
'Tidefall' Skirt
(Optional) If using a long rope as I did, prepare it by Chain-Stitching it as shown above. I used ~120’ (~36m) of rope. That’s the same as four pieces of the longest rope I normally use, which would have meant I had to extend my rope 3 times. But doing it with shorter pieces like that would have been quicker to tie … so you need to decide if the extra time and hassle is worth it! The answer may be different if you are going to a party or are tying for photos. 😉
Create a quick-release frame line using a Sheet Bend.
(I just want to show you the monster of a rope bundle I am working with!!)
Coming out of the node let’s mimic the second half of the Cow Hitch by first of running the tail behind the line…
…and then back through itself.
This gives us an attractive point to launch off and start creating a series of Cow Hitch is.
This time, make them the same size all the way around.
When you get back to your starting point…
…add a second row anchor/frame line as shown in IOTK: “Row 2+, Option 1 – Add a new frame line”
…
Lock the new line in place with a Cow Hitch.
For the second row, you want the Cow Hitches to be positioned inside the drape of the prior row.
For Tidefall, run the line under the prior row…
Repeat all the way around, keep the drapes at the same size…
…
…
…
For this next row and all the rest, we will now be connecting to the bottom of the drape in the prior row (as opposed to creating a new frame line).
Like this.
Note: I am using short drape lengths here. If you use longer lengths, you will use up rope more quickly and you will end up with a longer skirt.
Now just keep repeating this until you run out of rope…
…
Let’s take one more look at how I am handling this stupidly long rope while doing all these Cow Hitches!
First, I run it behind the loop from above…
…then over top of itself.
Once I pull that though, I have the first half of the Cow Hitch.
Then I run it behind the loop again, but up from the bottom…
…
Once I have a some of it pulled through, I immediately begin running it down through the new loop I am making…
…like this…
…then keep working the line through that path, up-then-immediately-down…
…this effectively lets me to two tail pulls at one time.
Finish the pulls.
Look at the knot.
Note that the outside line is laying below the inside line…
…fixing that constriction issue.
Then tightening and dressing the knot…
…
…
If I need more rope, I release some from the Chain Stitch…
…
…
Now I am ready to continue.
Repeat all that until you run out of rope. One why to end is to just tie an Overhand Knot instead of a Cow Hitch, then…
…tuck then ends behind.
Done!
(Aside)
Remember all that rope I had left over from the outfit’s top? I decided not to do anything more with it as that would have been a major departure from GodlyMana’s original design, so I just ran it up behind the lines, out of the picture.
This outfit has those cool quick-release features. If you release this Half Hitch, you can just pull the whole outfit apart without having to untie everything!
Same for the skirt; this is the key Half Hitch.
Comments
Loading comments...
Sign in to leave a comment.