
Lashings
By Lazarus Redmayne
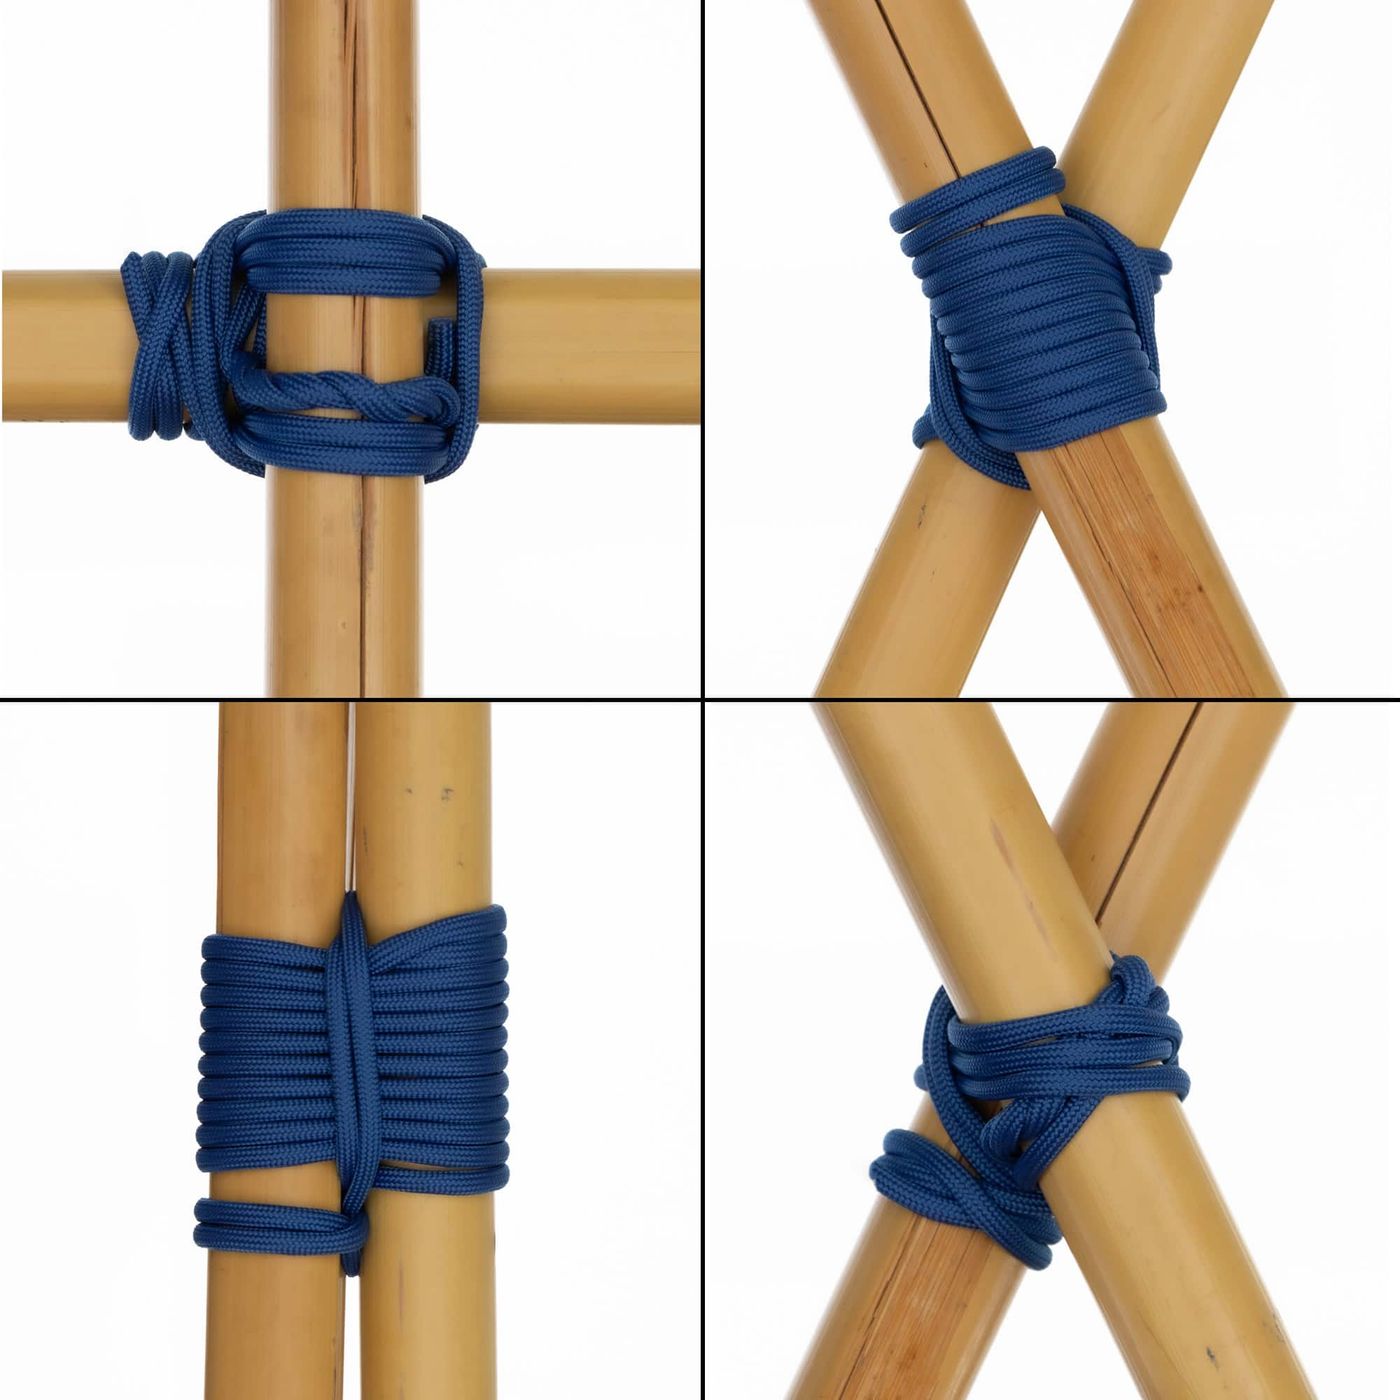
You can add even more variety to your scenes by incorporating a bondage frame. These are often made by add rods of bamboo, perhaps tied together in some form of frame.
While bamboo is great for this, you can use other rod-shaped objects. It can be natural sticks, dowels, rods, pipe, broom sticks, hockey sticks, … whatever fits the mood you want to set! One weakness with smooth rods like dowels and pipe is that the Lashing can sometimes be worked free if your partner can twist the rod. The bumps on bamboo or natural sticks usually prevent this attack from succeeding.
There are many cool ideas for a bondage frame. A-frames are popular, as are Crosses/T-Frames or X-frames, but there are many others you could create … including ones that are 3D (cubes, pyramids, tesseracts, etc … well, maybe not a tesseract…)
In order to make a bondage frame, you will need to connect the various pieces together. “Lashing” is the term for the types of knots used for this purpose.
Here are a few lashing techniques you may find helpful:
Anchor Knots - Used as the starting point and tie-off for the various Lashings below (Video)
Clove Hitch - Pictures & Text
This is a simple method to get a fairly good grip and is the often used as the starting point or to finish off a Lashing
Run the end of your line around the pole
… And over top of itself
… And around the whole again, continuing in the same direction
If you go under the crossing line on this side of the incoming line, you will make a Clove Hitch
Like this
Tighten
Complete
Constrictor Knot - Pictures & Text
This knot grips much more firmly and is much more difficult to undo. This is a good choice when you would like the lashing to be permanent.
Run the end of your line around the pole
… And over top of itself
… And around the whole again, continuing in the same direction
If you take your end and run its over top of the incoming line and then underneath the X like this, you will make a Constrictor Knot
Like this
Tighten
Complete
Timber Hitch - Pictures & Text
Run your line around the pole
Then run the and around the incoming line
Twist the and around itself
Tighten
Complete
Lashings
- To connect two sticks between 60° and 90°, use the Square-Lashing
- To connect two sticks between 0° and 30°, use the Sheer-Lashing
- To connect two sticks between 20° and 70°, use the Diagonal-Lashing (in practice, I don’t often use this)
Square-Lashing – Used to connect two sticks at right angles or nearly right angles
Square Lashing - Pictures & Text
This is used to connect poles at right angles or close (in the area of 70° - 90°)
Create a Clove Hitch around one pole
(Optional) Wrap the short tail around the working end, just as you would for a Timber Hitch
Place the second pole at right angles on top of the first, then run the tail over that pole…
…then under the first pole, and over the second on the other side.
…and continuing on in that fashion until you have complete 3 wraps (more if you are doing the Lashing with very thin cord or twine)
“Wrap Thrice”
Once you complete your three wraps, reverse the tension by coming around the to the top of the first pole (the lower one in this picture)
Now “Frap Twice”. This means to wrap the working end around all the cords that you have just placed, pulling them even tighter, adding tremendous tension and holding them firmly in place
Continue around…
…and around.
As you complete each wrap, pull hard to tighten
When you have arrived back at your starting point for the 2nd time you just need to lock it off.
Classically, you lock it off to the original starting point…
But you can also tie it off around the middle just as you have been Frapping.
This option is more symmetrical, it doesn’t have extra wraps on one of the poles, but it is not as strong. Don’t use this version if you need the frame to be its strongest or if you want a permanent Lashing.
Using the more secure approach, I have added a Clove Hitch here…
You can do this with a Constrictor Knot if you want it more permanent
… and then have tightened it firmly against the Lashing
Close-up of the completed Square-Lashing
A Square Lashing can be flexed somewhat away from right angles
Sheer Lashing – Used to connect two sticks in parallel or at a tight acute angle
Sheer Lashing - Pictures & Text
Create a Clove Hitch around one pole
Place the second pole parallel to the first
Wrap your rope around that second pole at least six times. (The more wraps you add the less flexibility you’re going to have in angle in these poles at the end). If you’re creating this lashing with very thin rope or twine, add more wraps
After the last wrap, run the tail between the two poles. You may need to twist the poles somewhat to create enough of a gap to allow for this
Frap twice. This means to wrap the tail around all the cords to cinch them tight. So, being your Frap, wrapping the tail around the cords, and up between the poles on the other side of the lashing
Then across the top of all the cords and down between the two poles on the first side of the lashing
And then around again
Once you have completed the fraps, lock the tail off with a Clove Hitch or Constrictor Knot around one of the poles
Here I have added a Clove Hitch
Tighten
Completed Sheer-Lashing
With the Sheer-Lashing, you can have your poles parallel…
… up to an angle of about 30°, depending on how tightly you made your wraps
(Close-up shot of completed Sheer-Lashing, twisted)
Diagonal Lashing – Used to connect two sticks at an acute angle
Diagonal Lashing - Pictures & Text
Start with two sticks at an acute angle. This can comfortably be anywhere between 20° and 70°
Create a timber hitch connecting the two sticks together and running the hitch around the long diagonal as shown
Wrap your cord around both sticks along the long diagonal three times trying to make it quite tight with every wrap
If you’re using thin rope or twine for your lashings, do it more than three times
Once you have completed wrapping three times this direction, bring your cord around and wrap around both sticks three times a round of the short diagonal
Like this
Once you have three wraps (more if you’re using twine)
Then bring the tail underneath the top stick…
…and began wrapping around all of the cords connecting the two sticks together. (These wrappings are just around cords, not around sticks.)
Around…
…and around…
…and around…
Once you have 2 wraps (more if twine), we now we need to lock it off.
We can lock it off to either around the fraps here. Or…
Locking it off around the frap is more symmetrical, it doesn’t have extra wraps on one of the poles, but it is not as strong. Don’t use this version if you need the frame to be its strongest or if you want a permanent Lashing.
… more classically (and stronger), lock it off to one of the poles
Here I have added a Clove Hitch to lock it off
You can do this with a Constrictor Knot if you want it more permanent
Then tighten it up against the lashing. The Lashing is now complete.
…or a bit wider (but not to a right angle)
This type of Lashing can be reasonably flexed a bit more narrow (but not all the way to parallel)…
(Close-up Shot)
Comments
Loading comments...
Sign in to leave a comment.