Chair Ties (A Mini Course)
A modular mini-course showing many ways to tie your partner to a chair!
There are many ways to tie someone to a chair, but despite what you have seen in countless movies and TV shows, it is kind of difficult to make a chair tie secure. Often, they show someone with just wrists tied to the arms of a chair … or maybe wrists and ankles … or – if they are really advanced – wrists, ankles and a band around the chest. If a determined person was trying to work themselves free, none of these would hold for more than a few minutes.
Here are a few options for each part of the body, so you can mix and match them to fit your vision!
For this tutorial, I used a variety of pieces of Natural 1/4" (6mm) hemp
I use an amazing Natural hemp rope provided by my affiliate Twisted Monk. Check them out!Prerequisites:
Core Techniques
Find anchor points on the chair...
If you want your partner to be able to fight and thrash, you need a sturdy chair. There are many anchor points on one!
1. Seat or back for waist or hips 2. Back for chest 3. Front chair legs for ankles 4. Rear chair legs for ankles and/or wrists
Other points not found on all chairs: 5. Armrest support for the knees 6. Armrest for wrists 7. Cross brace as a middle anchor for hips or ankles
...or make more if you need them.
It can be helpful to have an anchor point located in the middle of the chair, but not all chairs have them. If you need one, you can just create one yourself!
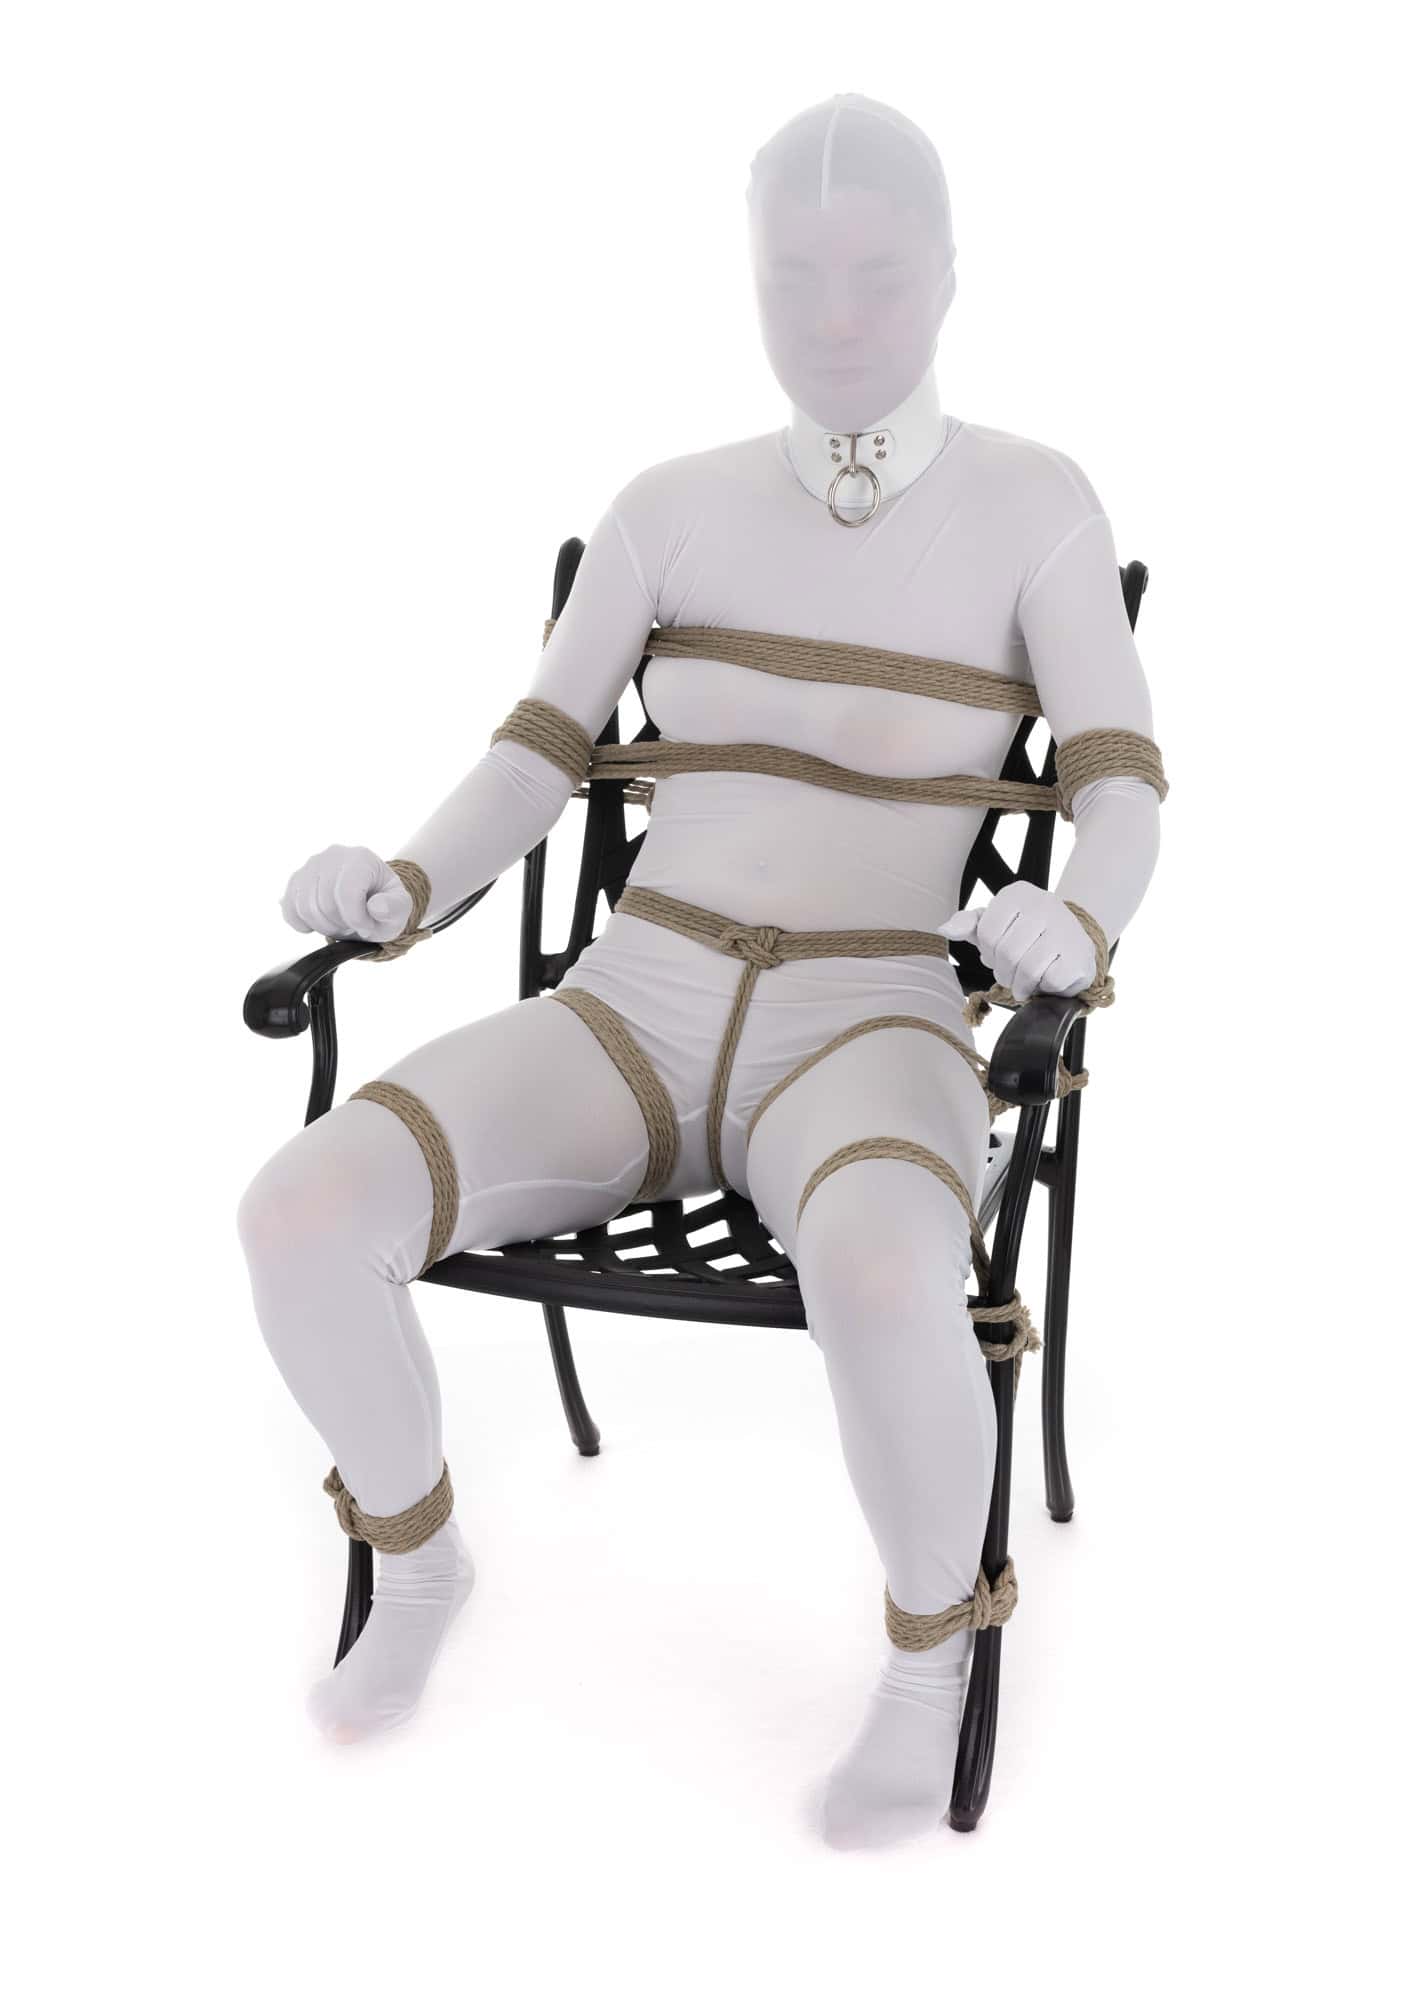
To tie a person to a chair securely, you need to make sure they can’t wriggle into other positions. This means making sure their core is locked down. When I do chair ties, I like to start with the hips/waist, then move to the chest, and then deal with the arms and legs.
Tying the waist or hips back into the seat helps keep them from trying to wiggle out from under the chest strap.
Use a Belt (belt knot on back)
…and tie it to the back of the chair or to a point you create.
Use a Belt (belt knot on front)
…then run the tail between the legs to be even more restrictive.
Start with an Unchastity Belt or other hip harness
Tie them back by the legs instead of the waist
Safety Note: This approach may put pressure on the crease where the leg meets the torso. There are nerves in that area that can be sensitive to being compressed if the ropes are too tight or if your partner puts sustained pressure on them while struggling, etc. Tell your partner to report any strange sensations (numbness, burning, etc.) in their legs or tops of their feet. If that happens, loosen these ropes.
Mix and Match!
Of course you can also always do more than one to really make your partner feel controlled!
You also need to tie their chest to the chair or in some other way keep them from leaning forward to try to untie their wrists using their teeth or thrashing around too much and possibly moving or knocking over the chair … which could possibly result in injury.
Wrap a new rope around a strap and elements on the chair
The most classic way is to have them sit firmly back in the chair and tie them directly to the chair back in whatever way you wish. Here is one way. This method is only effective if you also have their hips or waist tied as described above. Otherwise, they can just sink down to work their way out.
Here is another example of that same idea
Use the tail from a chest harness or strap around the chest
Knots in the middle of the back can be uncomfortable if the chair has a hard back. Consider adding a pillow if needed to cushion the back.
Alternatively, you can have them sit back and tie them directly to the chair back.
Wrap a new rope around a strap and elements on the chair
Between two straps or two points on the same strap
This can be helpful if the chair’s back is solid.
There are lots of options for the legs, too!
Legs together
Legs apart, ankles tied to the front legs of the chair
Legs apart, ankles tied to the back of the chair, keeping the feet off the ground
This can keep them from trying to kick the chair over … it also provides for some … access.
How you handle the arms and wrists depends on your goals and on the nature of the chair, whether it has arms or not, their shape and location. Here are several options to get you started.
Wrists directly to armrests
Wrists to back legs of the chair
Adjustable Box Tie
Bunny Tie
Straitjacket position
Sarcophagus/Egyptian position
Optional: Add a strap around the entire torso and chair when done to make this even more of a hug.
Add a hip harness to increase security
This is not commonly done, but you can increase your partner’s sense of helplessness further by limiting what they can do with their head.
Risk Management: Bending a person’s neck backward too far or keeping it craned backward for too long can be very uncomfortable. Done to too great an extent and it can cause injury. Negotiate on this point and go slowly, test your partner’s capabilities and limits, and always keep good communication.
Here are two methods. There are many others.
Across Eyes
You can put a simple Lark’s Head Knot or a Single Column around your partner’s head across their eyes and use it to tie their head backward using whatever approach you like.
Risk Management: Do not do this if your partner is wearing contacts, has had Lasik or other eye surgery, or for any other reason should not have pressure across or on their eyes.
Through Mouth
You can also run a simple Lark’s Head Knot or a Single Column through your partner’s mouth and do the same thing.
Risk Management: Rope coming in to contact with the mouth and other mucus membranes brings risk of passing infection or other health issues. Use a barrier method to protect your partner and your rope or use a rope dedicated just for that particular person.
Applying the core techniques to other types of chairs
Reminder of common anchor points
1. Seat or back for waist or hips 2. Back for chest 3. Front chair legs for ankles 4. Rear chair legs for ankles and/or wrists
Other points not found on all chairs: 5. Armrest support for the knees 6. Armrest for wrists 7. Cross brace as a middle anchor for hips or ankles
Here is one way you might tie your partner to a wheelchair
Other options for tying the arms might be (not shown): the Bunny Tie, Straitjacket or Egyptian positions shown in the main tutorial above.
Examples / Artist's Corner
Anchor points are largely the same as for any other chair with four legs.
1. Seat or back for waist or hips 2. Back for chest 3. Front chair legs for ankles 4. Rear chair legs for ankles and/or wrists
Other points not found on all chairs: 5. Armrest support for the knees 6. Armrest for wrists 7. Cross brace as a middle anchor for hips or ankles
Optional: Convert the chair to a non-folding chair
Example / Artist's Corner
After that, let your imagination guide you! Here is one way...
Tall stools can be interesting because your partner cannot touch the floor with their feet. This gives them less to work with, but also introduces risk. Falling from a higher place when you cannot catch yourself is a serious risk. So warn them about that risk. Also, you can take steps to reduce their ability to move enough to tip the stool.
As always, never leave a bound person alone. Protect your partner.
Common anchor points
1. Seat or back for waist or hips 2. Back for chest 3. Front chair legs for ankles 4. Rear chair legs for ankles and/or wrists
Other points not found on all chairs: 5. Armrest support for the knees 6. Armrest for wrists 7. Cross brace as a middle anchor for hips or ankles