
Building Blocks - Junctions
By Lazarus Redmayne
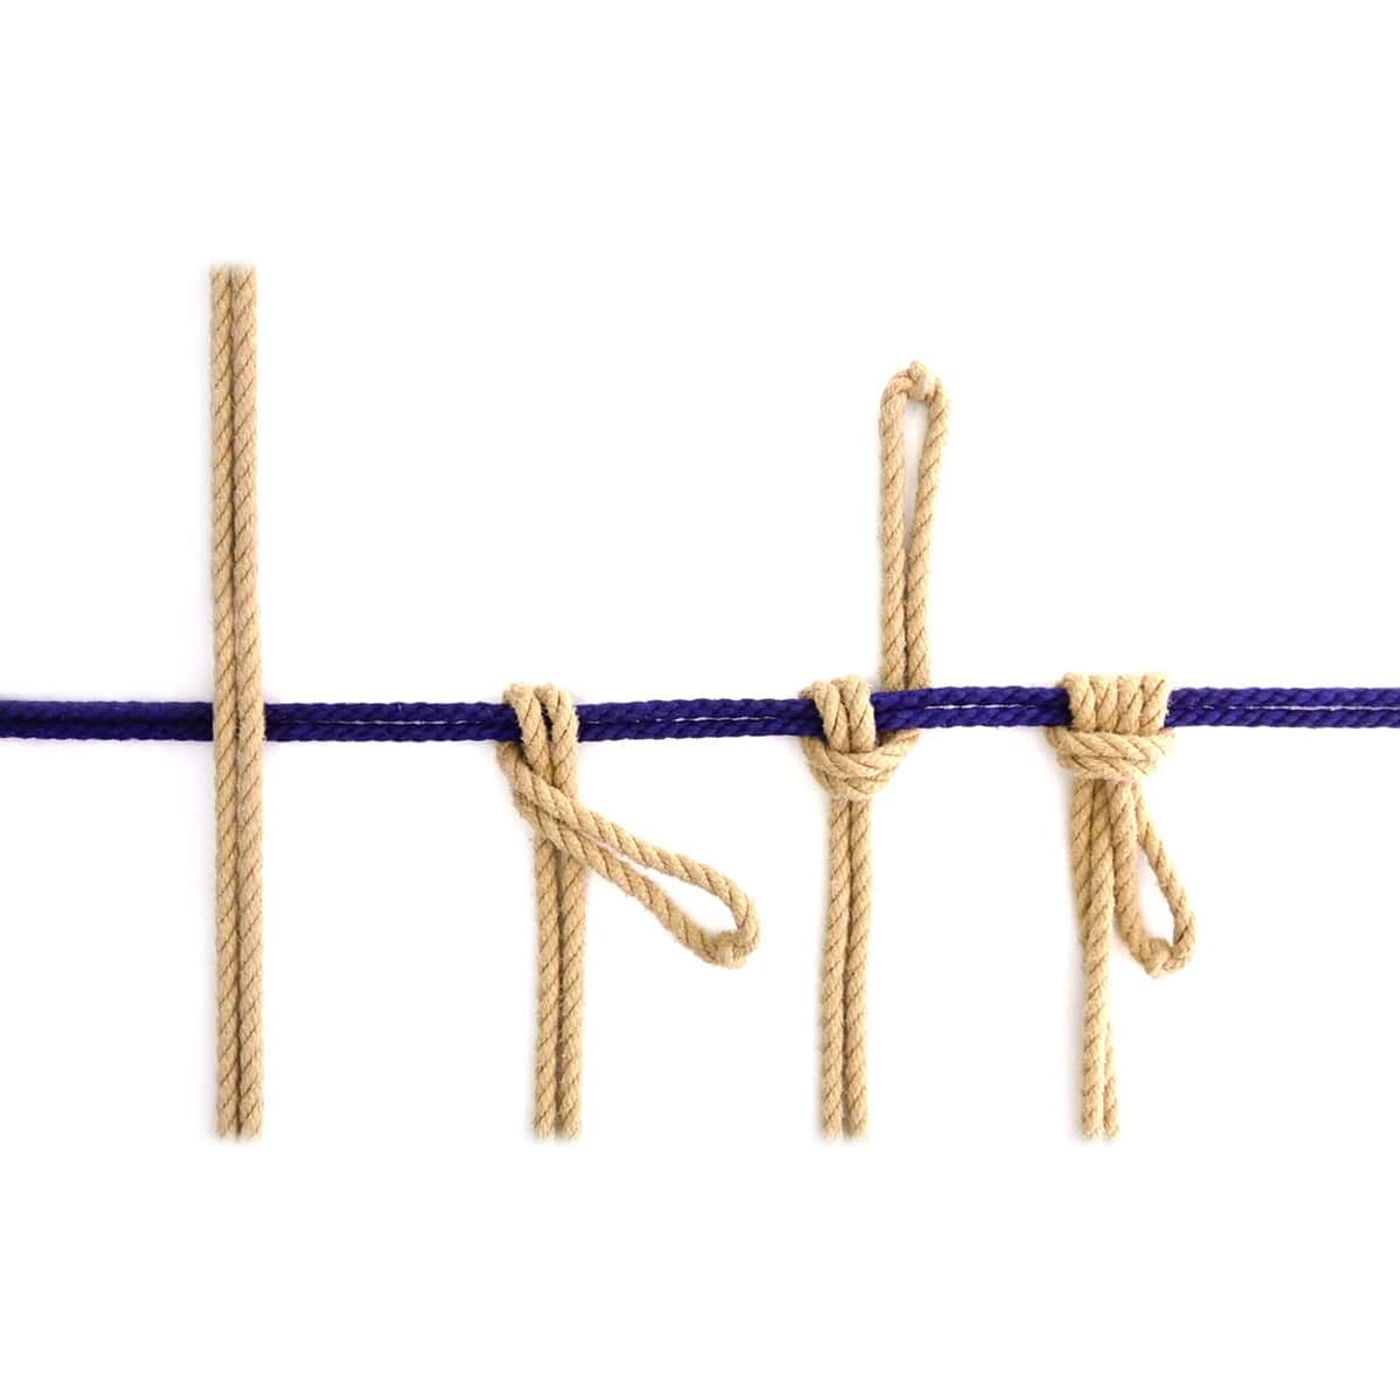
One very common activity when rigging is when deciding what to do when two ropes cross each other. Which direction do you want them to go as they move away from the junction? This is something that you may not have thought much about if you’ve always been tying to a known pattern, but when you start to try to create on your own, understanding a few basic building blocks can be extremely helpful.
Here are a few options when two ropes cross each other and how they are all related…
Rope Needed
I am using two 10' (~3m) pieces of Natural 6mm (1/4") hemp provided by my affiliate Twisted Monk. Check them out for some amazing hemp rope!
The Big Picture
The Big Picture
When two rope cross each other you will either connect them or not connect them. If you connect them you have a few simple choices ... and they are all related.
- If you are coming straight back down, you can just fold the rope over or use a Cow Hitch
- If you are going down and the left or right, you just use a twist
- If you are going straight up, you use a Crossing Hitch (aka Nodome) (either-handed)
- If you are going up and to the Right, you use a Right-handed Crossing Hitch
- If you are going up and to the Left, you use a Left-handed Crossing Hitch
Video
Pictures & Text
When one rope crosses another, you have a bunch of options. If you want the rope to continue moving upward and to be able to move freely over the other rope, you do nothing at all … like this
If you want the rope come back down and be free to move with respect to the other rope, you do nothing more than pull the tail underneath the crossing line … like this
If you want it to go down and to the right, you simply fold the tail over top of the incoming line…
…this is good for almost any direction you want to go in this quadrant even all the way to the right
And if you want the rope to have a decent grip on the crossing line and continue to move upward (as opposed to #1 where it can move freely), you simply take the tail from this point and go underneath the crossing line. You might recognize this as the Crossing Hitch (aka Nodome or Munter Hitch). 😊 So now you can see how a number of different potential choices of how you want your rope to move are all related!
Now if you would like to come up to the upper left quadrant (that I am pointing to), you use this exact same technique…
… Just move the tail the direction
It is important which direction you make your Crossing Hitch when you have it go at an angle. If you do it like this, the tension on the cord moving away from the junction will tend to make the Crossing Hitch tighter and therefore have a stronger hold. This form is called a “closed” Crossing Hitch
If, on the other hand, you position the cord at an angle like this, you can see that it tends to make the knot less tight—have a weaker hold. This form is called the “open” Crossing Hitch. Normally this is not what you want. But before I show you how to tie the cord if you do want it to move this direction, let’s look in one more thing we can do with this form…
If you loosen the bight just a little bit…
… and then pull the tail through that bight…
…and then tighten it, you will have created the “cow hitch”. Structurally, this is exactly the same as a Lark’s Head Knot, you simply tied it on to the crossing line. This knot is a great way to have your tail come down, but also have it locked firmly onto the crossing line and not able to easily slide
It is also a good option if you would like your tail to move down and to the right and have a firmer grip than it would if you chose #3
Starting again. Let’s talk about the Crossing Hitch in a little more detail. The trick to a Crossing Hitch is: if you plan to have your tail move away from the junction at an angle, you start your Hitch on that same side. In this example we want it to end on the right hand side, where I am pointing. Therefore,
…you will pull the tail underneath a crossing line on that same side (the right)
…like this
Then bring the tail over top of the incoming line.
(By the way this is a way of getting the tail to the lower left with a light grip.)
(By the way...)
(…and it works all the way over to pointing all the way to the left…)
…and then go under the crossing line to form your Crossing Hitch
…and then move it to the right if desired!
Go forth and create!
Comments
Loading comments...
Sign in to leave a comment.