
Wrapping Spicy Presents
By Lazarus Redmayne
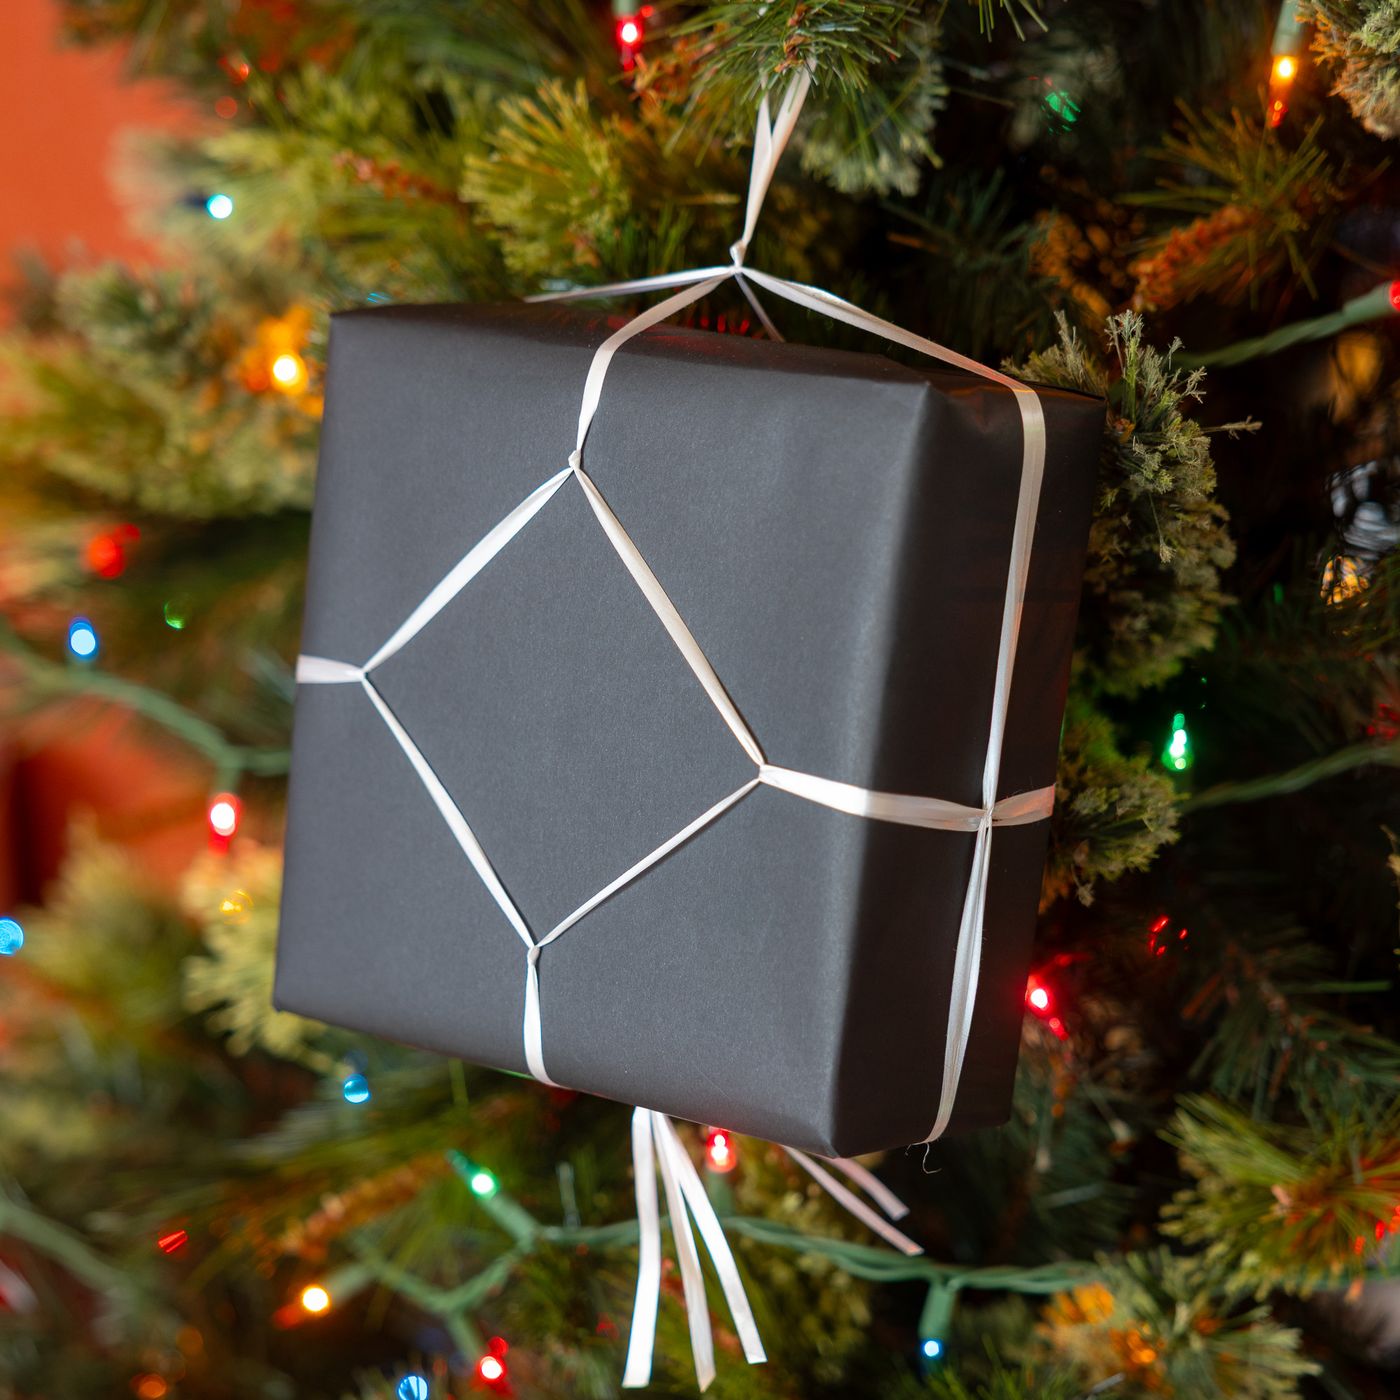
Wrapping spicy presents. Here is one way to add shibari-style ribbon to a gift to add a special little signal!
I did this example using ribbon, which can be a little challenging to work with as it is more slippery and once you have firmly placed a knot it can be very difficult to undo it should you want to move it. It is easier to do this with string, twine or other round cordage.
I demonstrate how to figure out the length of cord you need live while you are tying, but for those of you that process things through a lens of math and engineering, I have also provided the dimensions and a few simple formula for figuring out how long each strand needs to be. See The Math section below.
Video
Just the visual walkthrough set to music this time. ;)
The Results
The Math
You don't need to do this math, you can figure out how much you need as you go, but for those of you that like math... ;)
Front and Back strands: Two of…
- 2 × (Loop + H + (L2 + W2)^(1/2) + T + 4K)
- (this formula assumes the longest path, when a=b=0, so that you will be assured to have enough)
Side Strands: Two of…
- 2 × (W + L + H + 2b + T + 2K)
For the example below, the dimensions are:
- Length (L): 18 cm
- Width (W): 18 cm
- Height (H): 8 cm
- Length of Loop (Loop): 5 cm
- a: 2 cm
- b: 2 cm
- Length of Tail (T): 15 cm
- Cord consumed by each Knot (K): ~2 cm
Tying up your package...
Measuring the ribbons for the front and back.
Add the following: The length of the hanging loop... (Optional)
Loop Length
… the length from the middle to the edge shared with the front …
H/2
… from the edge to the point you want the diamond to start …
a
… from there to the point you want the other diamond point to be …
((L/2 - a)^2 + (W/2 - b)^2)^(1/2)
… back down to the other point …
… to the edge …
a
… down to the middle of the side …
H/2
… give yourself 15 cm or so of tail …
T
… this will also have 4 knots, that will require 1-2 cm each …
4K
… add that.
That point is the *bight*, so…
… double the length of the ribbon.
x 2
Cut there.
One ribbon done.
But you need two, one for the front and one for the back.
Use the first one to measure the second.
That’s the first two done!
Measuring the ribbons for the sides.
Now we need the ribbons for the sides
Add the following: The length from the middle to the edge shared with the side …
W/2
… from the edge to the middle …
L/2
… from there to the edge shared with the front …
H/2
… from there to the point you want the diamond to start …
b
… then back to the middle …
… over to the edge shared with bottom …
L/2
… to the middle of the bottom …
W/2
… then add the tail …
T
… there will be two knots in this strand, so add something for that …
This will be the bight for this strand.
2K
So double the length…
…then cut.
That’s one strand done.
We need a second for the other side.
Now we have all 4 strands we need!
Front and Back Ribbons
Start with the first two.
Find the bights.
Stack the strands…
…so we can treat the strands as one for the moment.
Measure the length of the loop.
Form an Overhand Knot.
Tighten.
Separate the strands so you have two and two.
Place the loop in the center of the top.
Measure to the edge…
… and down the front to the point you want the diamond to start.
Place a Square Knot here.
Form the knot.
Tighten it carefully so that it ends where you want it to be.
Double check before you tighten fully.
Pin the knot in place, then …
… trace the path of the diamond …
…
… to find the location of the next knot.
From a Square Knot.
Tighten a little.
Confirm the location then tighten fully.
Now repeat those same knots again at the same place on the other strand.
Like this.
(Of note, it seems these knots are spaced about equal to the Length (L)… I will experiment to see if this is something that can be use as a general rule to simplify things. If you experiment, let me know!)
Organize both strands so they lay flat and neat together.
Place the strands so that the last knot is in the correct position.
Run the strands over the edge to the middle of the bottom.
Mark that point.
Add a Square Knot with all 4 strands.
Confirm the location.
Tighten.
This is the complete ribbon.
One side goes on the front and one on the back.
Side Ribbons
Retrieve the other two ribbons.
Find the bights.
Take the bight of one and …
Put it into the bight of the other.
Position them so the bight of the first one is above the strands of the second.
Pull the strands through.
This is a shortcut method to make a Square Knot using two bights. Don’t tighten it yet.
Before tightening them, place the lift loop of the front and back ribbons into the center.
Now tighten them so these new strands have a firm grip on the others.
(Do the following steps on both sides.) Run the new ribbons around the corner …
… to the middle of the side. Add a Square Knot at this point.
Like this.
(Repeat on the other side.)
Separate the strands and run them up to the front and back, through the strands of the diamonds (like the Hishi Karada).
Add a little tension to both front and back at the same time. This will tighten the front and back ribbons and begin to form more clear diamonds.
(This next set of steps can be a bit fiddly. It can be helpful to have an extra set of hands or a small weight or something to help hold things in place on one side while you work on the other.)
Bring the strands back the way they came.
Run them through strands of the side ribbon on the incoming side of the knot on the side.
Like this.
Pull them through.
Repeat on the other side. Tighten them at the same time to help keep things stable. It will like take a bit of work to make things lay as planned. Again, another set of hands can be helpful.
Run them to the bottom.
Before you lock off the tie, work the weave so that things lay as they should.
Bring the side ribbons under the front/back ribbon.
Tie off with a Square Knot.
Like this
(Optional) Trim off the ends of the ribbon …
… so they are even.
Done!
Comments
Loading comments...
Sign in to leave a comment.