
Shinju
By Lazarus Redmayne
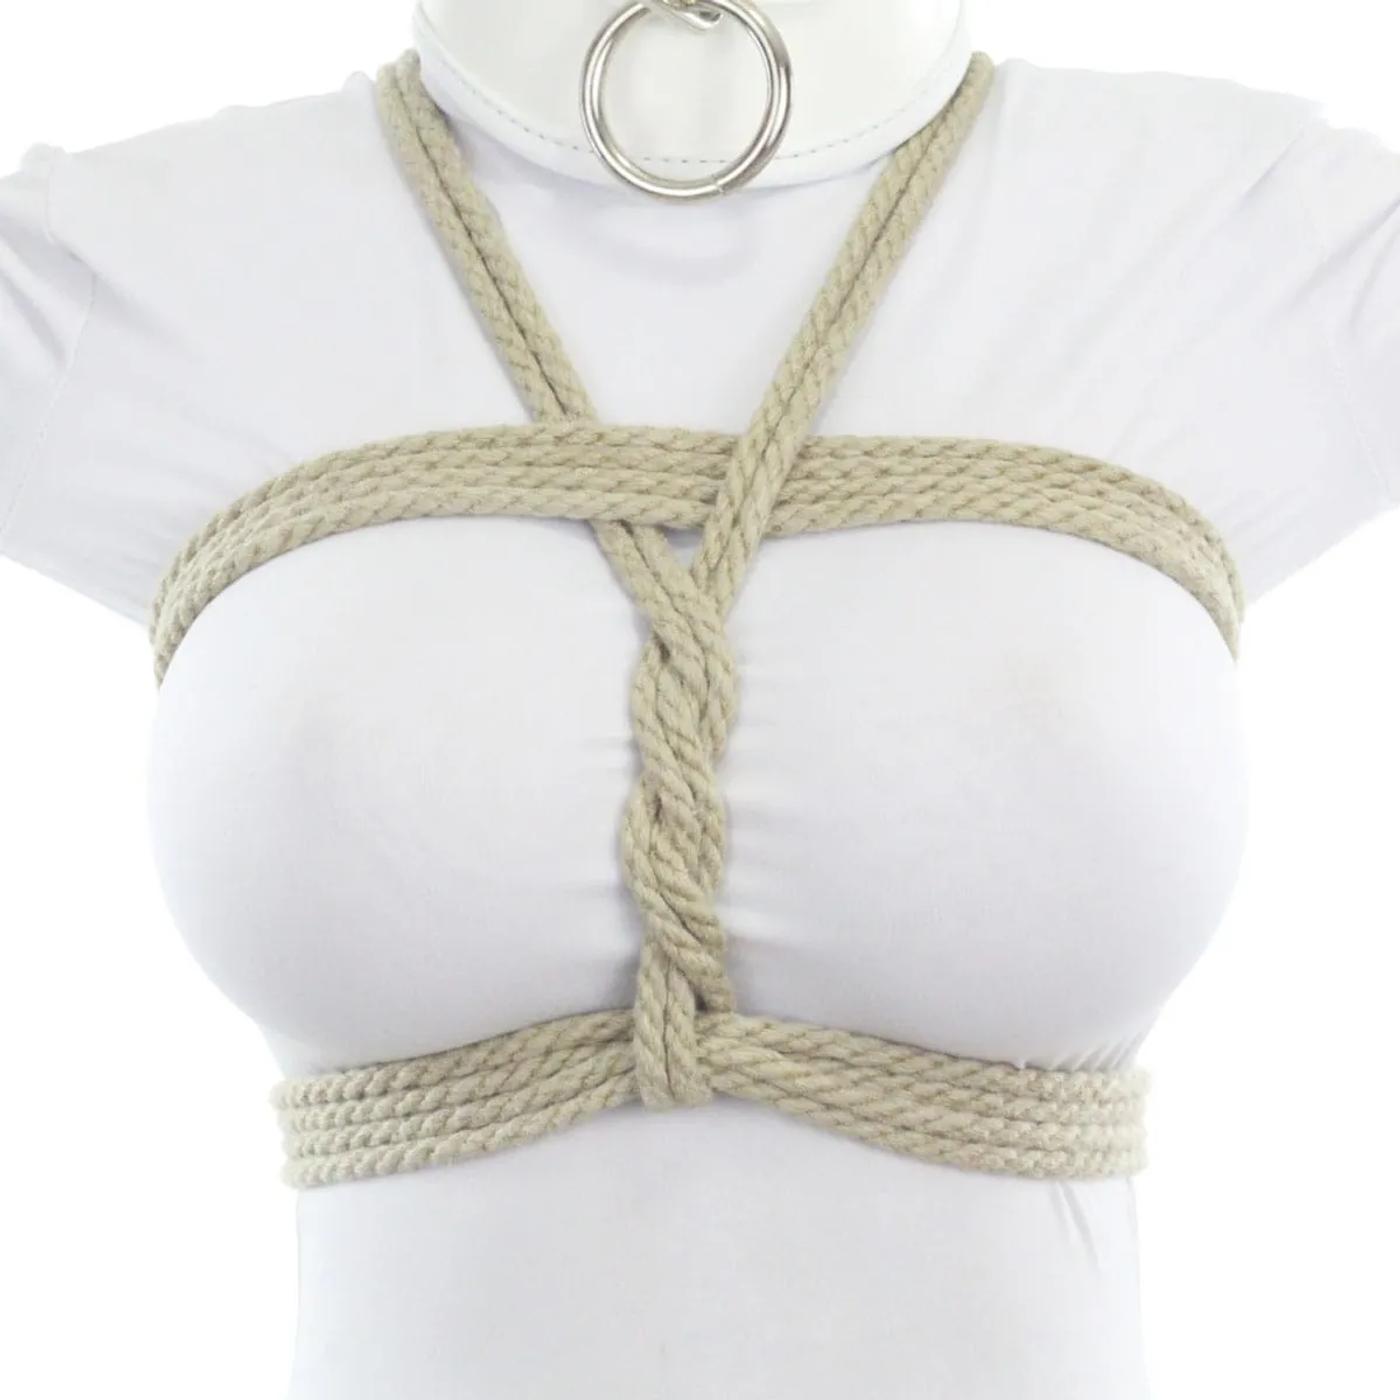
This classic chest harness, known and practiced by riggers throughout the world, is simple, secure and, when applied properly, can be used for suspension. Using this as your primary upper-body suspension attachment harness means that your partner's weight is supported by their rib cage and not their arms, reducing the risk of radial nerve injury so common with the standard TK (Takate Kote). Also check out the Suspension Shinju, an update that is even more interconnected and good for suspension.
This tie can also be used for breast bondage: Make the upper and lower chest straps very tight, then use the line that goes between the breasts to cinch the upper and lower chest straps together, thereby trapping and accenting the breasts. Other breast bondage techniques can be found in the Cross-your-heart Breast Harness and the Cinch & Wrap Breast Bondage tutorials
The video shows the more classic method of building the top strap first. The pictorial version shows an alternate where we build from the lower strap first.
Notes: If you plan to use this for suspension, make sure the lower strap is not too low. You don't want it around just the lower ribs; the ribs in the center and upper chest are much stronger and more able to safely hold a person's weight.
If you are tying a larger body--doesn't matter if it is due to muscle or fat--you need more support or it will become unbearable quite quickly, so add more wraps to the upper and lower straps. Instead of stopping with 2 as I do here, add 3, 4 or even 5. If you need more rope, just extend it :)
Rope Needed
For this tie, I used one 30' (~9m) piece of Natural 6mm provided by my affiliate Twisted Monk. But my model is quite small and you may need more.
Video
Pictures & Text
Place your fingers through a bight at the center of a long rope
Wrap the rope around your partner's lower chest, grab the tails with your fingers
Reverse the tension and begin wrapping the tail around again, below the first wrap
We wrap below so that the tail will naturally flow upward once we lock off the first strap
Reach through the new bight and grab the tail
Pull the tail through
Hold a bit of the tail with one hand, then reach under the lower strap with your other hand and grab the tail
Pull the tail through, keeping a bit back
Reach through that protected loop (my left hand in this picture)...
Grab the tail (or hand the rope to your fingers like I am doing here)
Pull the tail through
Make sure that all the strands in this strap are flat and even and have the same tension
Tighten the half hitch to lock off this strap
Run the ropes around the upper chest, then reach under the newly placed line and grab the tail
Reverse tension
And run around your partner's upper chest again, placing this second wrap below the first wrap
Reach through the bight that you formed in step 14 and grab the tail
Pull the tail through
Hold a bit of the tail with one hand and use the other to reach under the upper strap and grab the tail...
Pull the tail through (like I am doing with my right hand), keeping a bit back to form a loop (like I am doing with me left hand)
You are already holding that loop, so just stick two fingers through it...
...and grab the tail
Before we lock off this strap, confirm that all the strands are even, flat and at the same tension. Adjust them if you need to.
Tighten the half hitch to lock off
Note that the rope is naturally leading toward the left shoulder in this case, so that is where we will take it next...
Lay the rope across the deltoid, not too close to the neck
Lay the tail over top of the cords in the upper strap
...and on top of the cords in the lower strap
Reach under the lower strap, placing your fingers on the *same side* of the tail as the shoulder the tail just came over
Grab the tail
29, Pull through
Hold the cords of the lower strap flat while you pull on the tail to tighten. Remember, you want this lower strap to be about the middle of the rib cage, not in the lower 1/3. This is what helps keep it high enough
Reach under the upper strap leading toward the opposite shoulder
Thus
This little twist will keep the upper strap from moving too close to the lower strap
We want to keep a separation here so that forces are distributed across more ribs.
For most people, you just leave it at the one twist and take the rope over the shoulder at this point. However...
If you are tying someone with a larger frame or with large breasts, you may find that there is a sparation between the twist and the upper strap
If that happens you may optionally choose to add a second twist by running the tail under the first shoulder strap a second time
...like this...
Before running the tail under the top strap...
..and moving it over the opposite shoulder. If you add this second twist, you will almost always need to dress the twists to make them look nice.
Bring the tail to the back. Lay it *above* the other shoulder strap...
...*Below* the upper chest strap
...thus...
...*above* the center line
Then lock it off with a half hitch by reaching under the upper strap to grab the tail
Keeping a bit of the tail back...
Pull the rest of the tail through. The part that you kept back will now form a little loop
Then reach through that loop...
Grab the tail...
...and pull through
Tighten to lock. This is the completed Shinju from the back.
Other than some rope that I need to use up...
Completed from the back
Wrapping the rope around the shoulder straps to use it up
Completed from the front
Comments
Loading comments...
Sign in to leave a comment.