
Chinese Crown Single Column
By Lazarus Redmayne
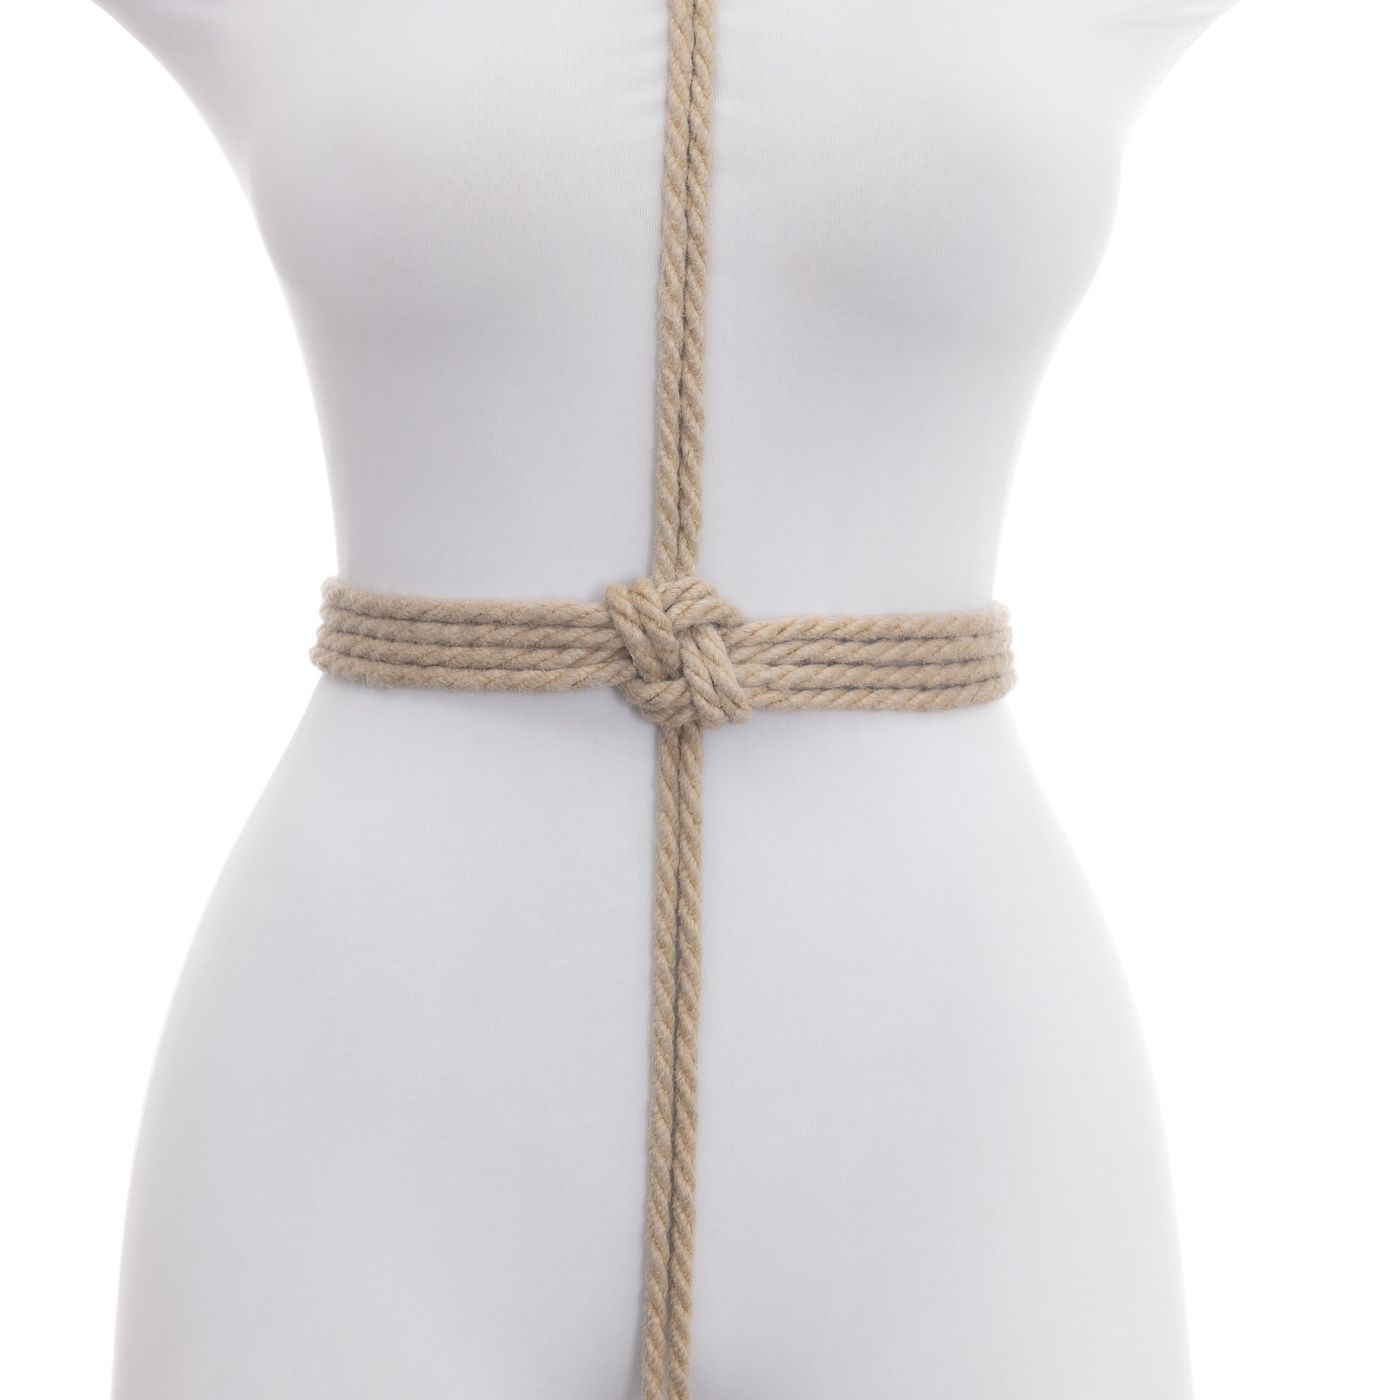
The Chinese Crown Singe Column is a simple, flat, attractively symmetrical special-purpose cuff perfect when you want the tail to be perpendicular to the cuff! It can be created at the beginning of the rope or in-line.
It is not suitable to be a central workhorse single column – those are the Somerville Bowline and the Lark’s Head Single Column – but it still has many uses:
- As a wrist cuff when you want your partner to be able to grab the line as it leads away from the hand.
- To make an attractive and compact bondage belt.
- To make a series of straps that all have the same compact, attractive, symmetrical node.
- As a replacement of the problematic use of the Clove Hitch in John Willie's G-String Tie.
- As a replacement for the Hojo Cuff. (It is not as fast as the Hojo Cuff, but it is more stable, so if speed is not important to you, this may be a good option.)
Important: This knot is directional. It is designed to be loaded in the directions shown. If you load it other directions, it can twist the cuff, which may put additional pressure on your partner's skin. Tie one snuggly around your leg, just above the knee and then try putting tension on the tail in different directions, observe and remember how things change and keep that in mind when using it on someone else.
History Note: I developed this single column in 2025 when working on the John Willie G-String Tie tutorial. The original instructions published by Bizzare magazine in the 1940s or 50s suggested the use of a Clove Hitch to tie the wrists. The rope community has long since stopped using that knot for safety reasons. If the person pulls on it, it gets tighter and often does not loosen when they stop pulling. Such situations pose serious danger of compression injuries, so I did not want to include that in my instructions. So I developed this approach instead as a non-collapsing but very compact way of achieving that same goal. That said, this is another technique that seems so straightforward that it would come as no surprise to learn that someone else had developed it independently as well, perhaps before me. I have not seen it before now, though, and searching through various sources did not immediately provide results. If you happen to be aware of and can show me a source that predates mine, I will be happy to change the name, but until then it is the Chinese Crown Single Column. 😉
Rope Needed
For this tutorial, I used two 30' (~9m), two 15' (~5m) and two 10' (~3m) pieces of Natural 1/4" (6mm) hemp. Extend your rope if you need more; use it up if you have too much.
I use an amazing Natural hemp rope provided by my affiliate Twisted Monk. Check them out!
Prerequisites


Video
Video Contents:
- Core Technique (0 :29)
- Slipped Variant (4:20)
- Inline Variant (5:11)
Highlights Version (Minimal detail. For experiences riggers.)
For no particular reason, let’s demonstrate this on a waist.
Make two wraps around the column.
Grip all the strands to keep them organized, leaving 6-8” (15-20 cm) of bight.
Run the bight behind the wraps. Confirm that the strand that was on the top (on the outside track) of the wrap is now on the inside of the track as it goes behind the wraps.
Run the bight over top of the wraps and under itself to form the first Half Hitch.
On the side opposite the bight, slip your fingers behind the knot and pinch it with your thumb to keep things stable. Hook the tail with the pinky of that same hand. Run the fingers of your other hand behind the strap, then hook or scissor-grip the tail.
Pull the tail through. The pinky prevents the rope from being pulled through all the way, giving you a path for the next tail pull.
You may not need to do this, but because I am tying this in a position where gravity is a factor, I am going to switch hands and use my left to keep the node stable for this next tail pull.
Feed the tail through that path you protected in Step 6.
You have completed the other Half Hitch. Now you need to tighten it into the first one. Pull up on this part of the knot.
Like this.
Put the finger of your other hand behind the knot to keep it from loosening, while you grab the tail with the other hand and …
… pull it down to remove the remaining slack.
If the band is not tight enough, you can tighten it.
Put your hand under the strands on the bight side of the knot. Hold the knot in place. Grab the strands of the second wrap.
Pull them through the knot…
Pull the slack around the column, then pull the lower lobe to remove that slack.
Again, tighten the second Half Hitch by pulling up on the upper lobe … then pull the tail down.
Dress the knot to put any disordered strands back in order.
Done!
Detailed Step-by-Step Version (For those new to rope)
For no particular reason, let’s demonstrate this on a waist.
Make two wraps around the column
(If this is the first time you are seeing this instruction and would like more detail on efficient ways to do this while keeping control of the rope, see the Somerville Bowline or Square Knot Single Column tutorials)
Grip all the strands to keep them organized. Arrange your grip point so that you have 6-8” of rope left on the bight side.
Run the bight behind the wraps.
I am going to pause a moment to point out something important. See how that strand that was on the top of the wrap is now on the inside of the track as I draw the bight down up? That is what you want. It will mean that the Half Hitch we are forming will be arranged in the most compact way. … Also: Leave some space open here. We are about to tuck the bight though that passage.
Take the bight.
Run it under itself to form the first Half Hitch.
Slip the fingers of your other hand behind the knot and pinch it with your thumb to keep things stable.
Run the fingers of your other hand behind the strap, then hook or scissor-grip the tail.
Before you proceed, hook the tail with the pinky of your other hand.
This protects a loop as you pull the tail up behind the wraps.
…
You may not need to do this, but because I am tying this in a position where gravity is a factor, I am going to switch hands and use my left to keep the node stable for this next tail pull.
Feed the tail through that path you protected in Step 11.
You have completed the other Half Hitch. Now you need to tighten it into the first one.
Pull up on this part of the knot.
Like this.
You can see that this tightened the other half of this Half Hitch until it is snugly against the first one.
Put the finger of your other hand behind the knot to keep it from loosening, while you grab the tail with the other hand and …
… pull it down to remove the remaining slack.
If the band is not tight enough, you can tighten it.
Grab the strand where the rope begins the second wrap.
Pull them through the knot…
… until that first wrap is the tension you want.
Pull the slack around the column…
…
… then pull the lower lobe to remove that slack.
Again, tighten the second Half Hitch by pulling up on the upper lobe…
…like this… then pull the tail down.
If the strands of the wraps became disordered, you can ‘dress the knot’ to put them back in order.
Done!
This technique can be converted to a Slipped variant or be tied inline!
Converting it to a ‘Slipped’ Version
This allows you to quickly untie the knot, releasing the bight end, allowing you to rapidly untie your partner, if needed.
Form the knot as usual, but leave the original bight a bit longer 8-10” (20-25 cm). Once the knot is complete, pull the bight out
Begin pulling it back in place, but don’t pull it all the way through…
Leave a little of the bight on this side.
Done!
If you need to release the tie, you can give this bight a sharp pull to release it.
In-line Variant
Let’s tie this in-line. In this case, one end is anchored and we want to add the Chinese Crown Single Column at some point after that.
Flip your hand so that your thumb is pointing the same direction as the tail is traveling, then grab the tail.
Maintain your grip and turn your hand over to form a loop with the outgoing side of the tail laying on top of the incoming side.
---
This is not a step, it is a preview of what we will be doing in the next few steps: You need to run the tail around the column and through this loop like this. There are many ways to do this, but here is one…
Adjust your grip to hold that loop steady while you…
…run the tail around the column.
Hook the tail with your pinky (or whatever) to hold things in place while you…
…bring your other hand back around to the front.
Swap hands, gripping the crossing of the loop with your other hand to hold it stable.
Run the tail through the loop, over the first side and under the second side…
…like this.
Adjust the tension (tighten it).
Run the tail around a second time.
Run it through the loop a second time, too 😊
…
Grip the tail with one hand to maintain the tension.
Run the fingers of your other hand behind the strap, then hook or scissor-grip the tail.
Pull the tail up behind the wraps.
I am going to pause a moment to point out something important. See how that strand that was on the bottom of the wrap is now on the inside of the track as I draw the line up? That is what you want. You will see why in a moment.
Now I am going to put my hands back in position, holding that line in place with my right hand while my left finishes pulling it up behind the wraps.
Your fingers are now perfectly positioned for the next step.
Feed the tail to those fingers.
Pull it through. You now have the shape we are looking for, but will need to tighten it.
Tightening the Inline variant of the Chinese Crown Single Column takes a few steps. (You need to follow the knot all the way around, removing the slack at each point. This is one drawback of this approach. Only you can decide if the attractiveness of the technique is worth the extra time!)
Begin by placing the finger of one hand behind the knot to keep it stable as you work. Then pull down on this first lobe.
Like this.
You can pull up on the second lobe here first…
…then pull the first part of the wraps to remove the slack.
Follow that wrap around to keep the lines neatly in order as you work.
Now grab the second wrap and pull it through the node…
… like this. This removes all the slack from the first wrap. Here is where you set the tension you want for the Single Column.
Repeat the tensioning process for the second wrap…
…
To remove the slack from the second wrap, you pull on this other lobe.
Like this.
Finish by tightening the Half Hitch, by first pulling up on this lobe…
…then pulling down on the tail.
If the lines have gotten a bit disordered during this tightening process, you can work them with your fingers to flatten them back out.
Done!
Comments
Loading comments...
Sign in to leave a comment.