
Teardrop Bolero
By Lazarus Redmayne
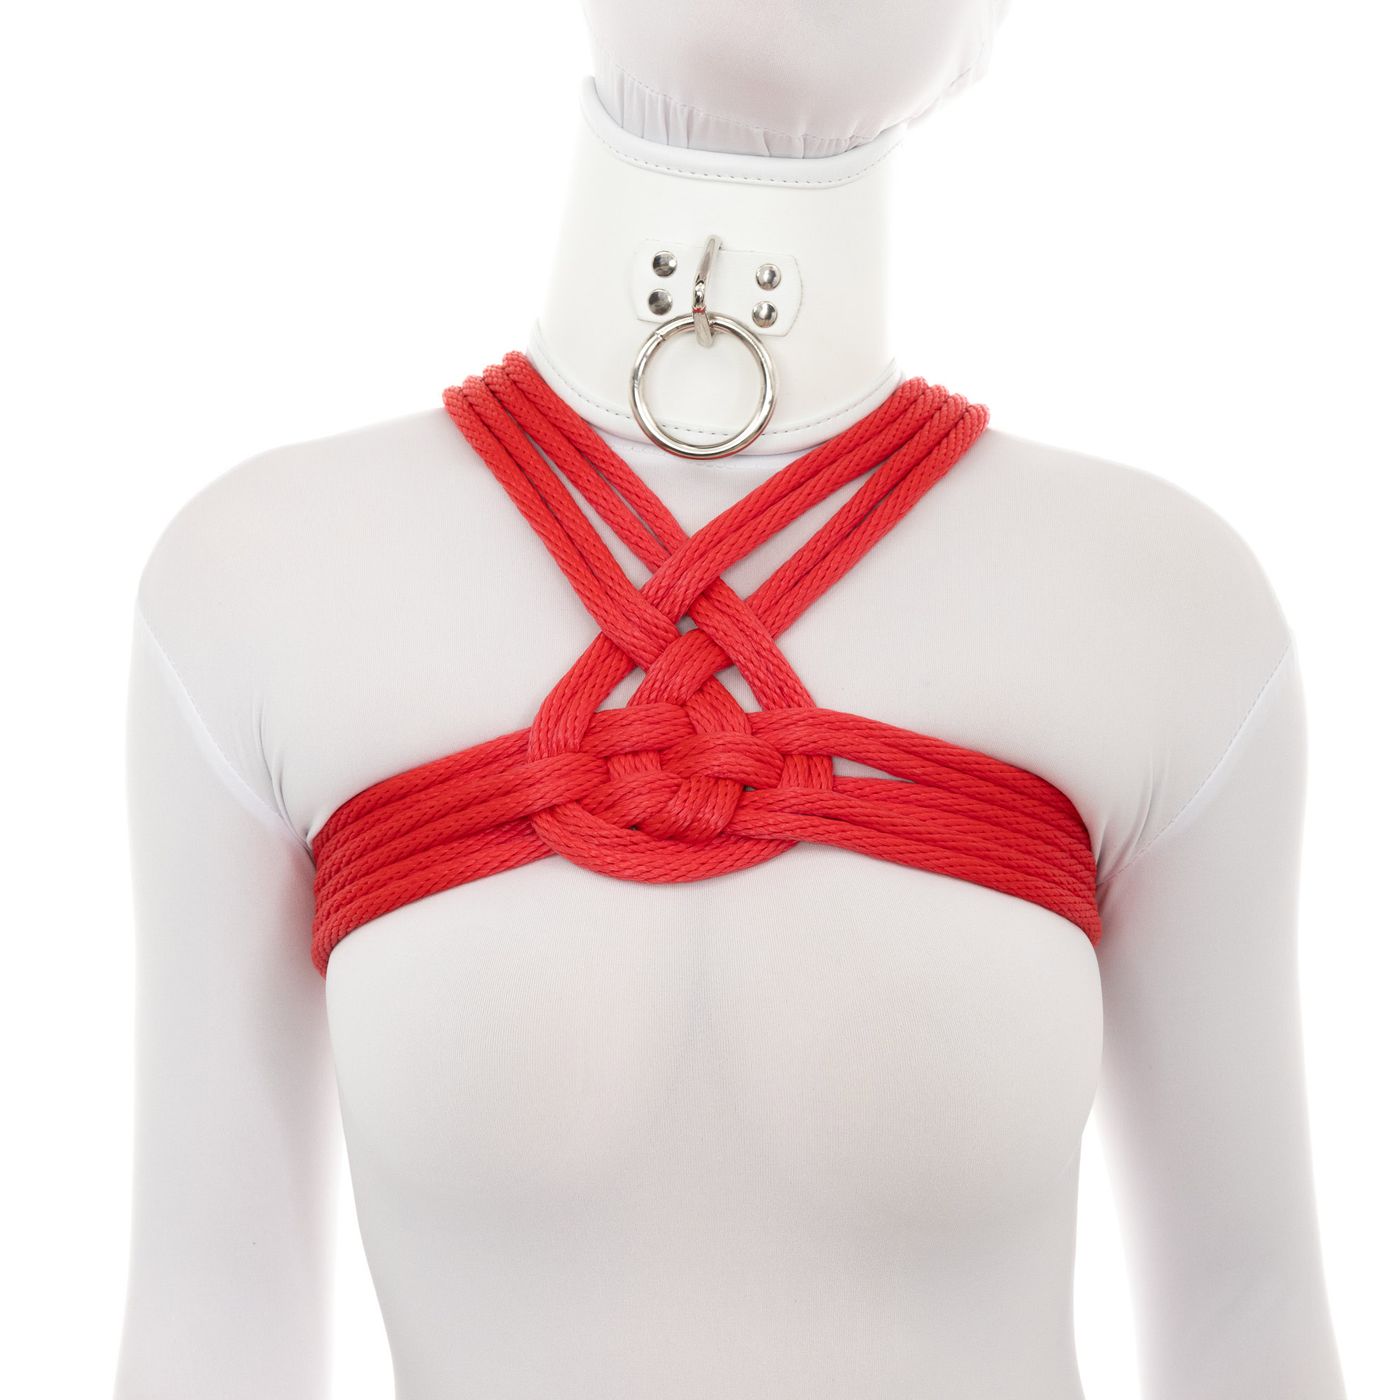
The Teardrop Bolero is an adorable shrug I developed while creating the Adapting Ties tutorial. I needed something that would allow certain adaptations to be easily seen. This is a simple, attractive upper chest harness that can be used simply as a fashion piece (this would nicely complement any of the Woven Hip Harnesses, the Teardrop Hip Harness, or the Leto Hip Harness if going for a fashion statement) or as a base layer of bondage that would allow you to connect additional layers to it. For example:
- You can put a single column on each wrist and then attach each to the back of this chest harness individually, allowing you to individually adjust the position of each wrist in a behind-the-back tie.
- You could use this to anchor the ankles into hogtie, instead of the connecting them to your partner’s wrists.
- You could use this harness as the connection point for an Ebi
- … among many other uses…
Blog Connection! When shooting this tutorial, I ended up doing a modification that I don't discuss below. To see a different way of doing the front, check out Blog: Comparison is the Thief of Joy, about halfway down, under sub-heading "Another example".
Important Note: This harness should not be used for suspensions; there is nothing truly anchoring it down, preventing it from working its way up over the shoulders.
Rope Needed
For this tutorial, I used one 30' (~9m) piece of red 8mm (5/16") MFP, provided by my affiliate AgreeableAgony.com. Extend your rope if you need more; use it up if you have too much.
MFP is great stuff! It is soft, strong, waterproof and machine washable. The colors don’t bleed or fade. If you are in the market for colored rope, check out AgAg! If you use this link, it will give you 5% off orders over $35. Also, check out their IG for more inspiration.
Examples
Video
Video Contents:
- Core Technique - 0:16
- Alternate Front - 5:20
Detailed Step-by-Step Version (For those new to rope)
Start with the bight at your partner’s back.
Run the tail around your partner’s upper chest, above the breasts / across the mid pectorals.
Bring the tail to the back and run it through the bight to complete the Lark’s Head.
Reverse tension and…
… wrap around your partner’s body…
… twice more, placing those wraps below the first.
Run the tail through the secondary bight…
… then continue following the natural curve of the rope and run the tail over the shoulder…
… to the front.
Run the tail to the center of the chest and weave it into the strands: Over the top two strands, under the middle two strands, and over the lower two strands.
Reverse tension and continue weaving, under-over-under.
Run the tail over the other shoulder to the back.
Take a moment to position the straps to provide a gap between them and the neck. The second shoulder strap will run here.
Bring the tail to the opposite side, running it under the outgoing shoulder strap…
… then run the tail over the strands of the primary bight, under the middle two strands, and over the lower two strands.
Reverse the tension and run the tail back up the other side, this time going under-over-under.
(Optional) For a more teardrop appearance, keep the strand running in parallel like railroad tracks.
Run the tail under the shoulder first wrap of the strap…
…then on to the opposite shoulder.
Run the tail over the shoulder to the front, then to the opposite side and weave it into the pattern. Go over the shoulder strap, then…
… under-over-under the chest strap.
Reverse tension, again keeping the strands in order like railroad tracks, and…
… weave it into the pattern as you go to opposite shoulder, over-under-over.
Weave it under-over through the shoulder straps, then…
… continue over the opposite shoulder.
Take a moment to make sure that the strands of this second shoulder strap have the same tension as the first set of strands. (Check & adjust both sides.)
Weaving the tail into the pattern. Under-over the shoulder straps, then…
… under-over-under the chest straps.
The harness itself is now done. Use up the remaining rope and lock it off. Here are several options:
If you only have a little rope left, you can lock off with a Half Hitch and then tuck the end under the weave.
In this case, I have enough rope to …
… continue the weaving pattern up the other side.
At this point I could just tuck the end under the weave, then…
… tighten the weave…
… completing the harness looking like this.
Or I can continue across the top of the central weave…
… weaving the tail through the shoulder strap lines, then…
… tucking the end under the weave
Done!
To see a different way of doing the front, check out Blog: Comparison is the Thief of Joy, about halfway down, under sub-heading "Another example".
Highlights Version (Far less detail. For people with experience)
Start with the bight at your partner’s back. Run the tail around your partner’s upper chest, above the breasts / across the mid pectorals. Bring the tail to the back and run it through the bight to complete the Lark’s Head.
Reverse tension and wrap around your partner’s body twice more, placing those wraps below the first.
Run the tail through the secondary bight, then continue following the natural curve of the rope and run the tail over the shoulder to the front.
Run the tail to the center of the chest and weave it into the strands: Over the top two strands, under the middle two strands, and over the lower two strands.
Reverse tension and continue weaving, under-over-under. Run the tail over the other shoulder to the back.
Take a moment to position the straps to provide a gap between them and the neck. The second shoulder strap will run here.
Bring the tail to the opposite side, run it under the outgoing shoulder strap, then run the tail over the strands of the primary bight, under the middle two strands, and over the lower two strands.
Reverse the tension and run the tail back up the other side, this time going under-over-under.
Run the tail under the shoulder first wrap of the strap on its way to the opposite shoulder.
Run the tail over the shoulder to the front, then to the opposite side and weave it into the pattern. (Over the shoulder strap, then under-over-under the chest strap.)
Reverse tension (this time keeping the strands in order like railroad tracks) and weave it into the pattern as you go to opposite shoulder.
Take a moment to make sure that the strands of this second shoulder strap have the same tension as the first set of strands. (Check & adjust both sides.)
Bring the tail over the shoulder to the back, weaving it into the pattern as you go.
…
The harness it self is now done. Use up the remaining rope and lock it off.
In this case, I have enough rope to continue the weaving pattern up the other side and then across the top of the weave, through the shoulder strap lines.
Tuck the end under the weave.
Done!
To see a different way of doing the front, check out Blog: Comparison is the Thief of Joy, about halfway down, under sub-heading "Another example".
Comments
Loading comments...
Sign in to leave a comment.