Your First Suspension – Basic Seated Suspension
This may be your first suspension. This tutorial finally gets your partner up in the air!
A Beginner's Guide to a Basic Seated Suspension Tie for BDSM
If you've mastered the basics of rope bondage and are ready to take the next step into the world of suspension, you're in the right place. This guide focuses on the basic seated suspension tie, an excellent entry point for rope enthusiasts exploring suspension safely and effectively.
Before we begin, remember that suspension requires a solid foundation in rope bondage, an understanding of safety measures, and ideally, guidance from an experienced practitioner. Let's explore how you can achieve a safe and enjoyable seated suspension.
What Is a Basic Seated Suspension Tie?
A basic seated suspension is a bondage technique where the rope bottom (the person being tied) is lifted slightly off the ground in a seated position. It’s a popular starting point for anyone learning suspension because it provides stability, comfort, and plenty of room to adjust and refine the suspension process.
Unlike full suspension ties, which often involve great strain and complexity, the seated suspension focuses on minimal lift and manageable tension, making it a great capstone tutorial for beginners.
Why Start With a Seated Suspension?
- Stability: The seated position allows for a lower center of gravity, reducing the risks for both the rigger (the person tying) and the rope bottom.
- Comfort: The tie distributes weight more evenly, which reduces pressure and discomfort for the bottom.
- Skill-Building: It reinforces fundamental rope skills and rope management without overwhelming the rigger.
If you’re new to suspension, we recommend practicing this technique with an experienced mentor present for added guidance and safety.
Common Pitfalls to Avoid
Even with preparation, some challenges may arise. Here are a few common mistakes and how to avoid them:
- Uneven Tension on Ropes: Practice keeping your ropes even and taut to avoid discomfort or instability.
- Overestimating Readiness: It can be tempting to move quickly into suspension without mastering the basics. Don't rush—each step prepares you for what comes next.
- Ignoring Verbal or Physical Cues: Always listen and respond to your partner’s feedback to maintain safety and comfort.
Mistakes are a part of the learning process—acknowledge them, learn from them, and improve.
Why Practice Matters
Suspension ties require time, repetition, and constructive feedback to master. Regular practice, either through guided workshops or under the supervision of an experienced mentor, will enable you to grow your skills safely and effectively. It’s not just about the technical execution—it’s about creating a trusting and collaborative experience between you and your partner.
When done right, suspension ties are not only stunning visual displays—they’re an incredible expression of connection, creativity, and technical mastery.
Elevate Your Rope Adventures Today
The world of rope bondage and suspension is both fascinating and rewarding. By learning a basic seated suspension tie, you’ll unlock an exciting new way to connect with your partner and deepen your skills in a safe, controlled manner.
Feeling inspired? Head over to our Suspension page to explore more advanced tutorials and techniques that build on this foundational tie. And remember—learning suspension isn't something you have to do alone. Join a community or find an experienced teacher to guide you safely through this incredible art form.
Happy rigging, and stay safe!
This may be your first suspension. This tutorial finally gets your partner up in the air!
This is a capstone tutorial, bringing together the concepts from the previous tutorials found on the Suspension page. I will be touching on many of those ideas in this tutorial, but I will not be going over the full detail of any of them and you need to understand those details before you can safely do bondage suspensions on your own, so be sure you understand the prerequisites >>
It is best to have an experienced person with you the first few times you do this, to help guide you and act as a safety net. I cover a lot here and in my other videos, but nothing can replace face-to-face training by an experienced teacher.Prerequisites: Have you mastered all of this material first?
If not, go back and do so before you proceed with this tutorial:
- Who can suspend? Who can be suspended?
- Suspension-specific safety and planning
- Harnesses used in this video: Shinju & Swiss Seat,
- Choosing rope for suspension support lines
- Evaluating a Hard Point
- The Emergency Munter
- Hangers
- Frictions
- Partial suspension
For this tie, I used three 30' (10m) and one 15' (5m) pieces of Natural 6mm (1/4") hemp provided by my affiliate Twisted Monk. Check them out for some amazing hemp rope!Note: The first 6 minutes of this video are exactly the same as the first 6 minutes of Partial Suspension. You may have skipped Partial Suspension and jumped straight here, and if so, I wanted to make sure you heard this important material... :)
This particular tutorial is too complex and long for my normal approach of including pictures and text descriptions, but here is a copy of the script we used for the shoot!
<>
<> Welcome today we are going to do what for many people may be their first suspensions. My name is LR and this is TheDuchy.com
- We will do a simple seated suspension, covering how to attach suspension support lines, support line handling, some safety,
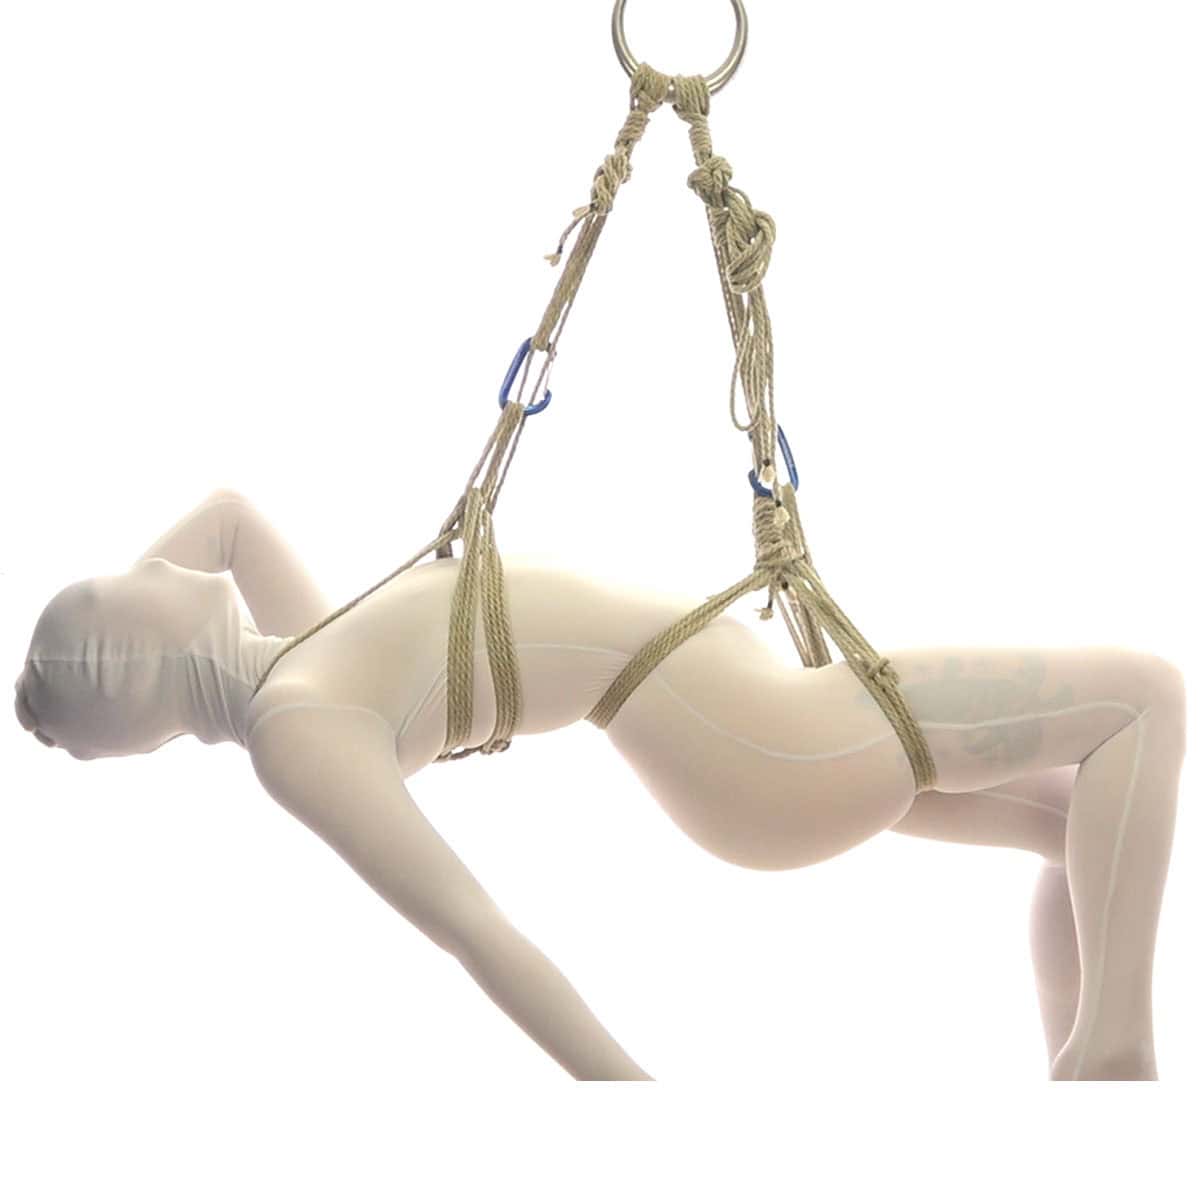
- then transition it to a face-up horizontal suspension.
- We will also go over normal let down procedures and emergency let-down procedures.
If this is your first suspension, have you mastered the prerequisites?
- <>
- I will be touching on many of those ideas in this video, but I will not be going over the full detail of any of them and you need to understand those details before you try this on your own
It is best to have an experienced person with you the first few times you do this, to help guide you and act as a safety net. I cover a lot here and in my other videos, but nothing can replace face-to-face training by an experienced teacher.
<>
I have evaluated the hard point and surrounding area. I understand how the hard point is supported, I have check the hard point itself,
<>
I have installed my own ring using the safety let-down munter and I have my EMT shears or EMT hook in my pocket and immediately accessible, I have checked my own rope and the carabiners that I intend to use and the floor under the hard point is padded. I deem this situation acceptable to trust with this risk
<>
I have talked with my partner and understand her medical and physical condition. < link to general and suspension safety> I understand her limitations and I have judged that she is capable of suspensions with the skills that I possess…
There is one very important point: You need to understand your capabilities and limits when it comes to suspension. You need to be honest with yourself about what you can do. My partner is light and strong with no relevant medical conditions – easy to suspend. But many body types can be suspended, far more than you see in most bondage online, but you as the rigger may need to develop skills and experience in order to do so. Own that. If you aren’t able to, don’t put that emotional burden on the other person; just tell them that you don’t know how to do so yet. We are all still growing. You don’t know everything. Neither do I. But we can learn.
While my partner and I talked, they also learned about me and judged that I am competent to suspend them. This is a very important point for you who are being suspended. You need to read the prereqs too so you can judge if the person proposing suspension is competent to do so. If you think they would benefit from having a backup, make that a condition of agreeing to the scene. I give a few smooth ways of doing so in my previous tutorials.
In this case, my partner told me that they have fainted once in a previous suspension situation and I explained that I had set up the hard point in such a way that I can get them down in seconds, if this were to occur and that I understand the first aid steps for normal fainting. Seeing that I have a plan and have prepare, my partner has greater confidence.
We have agreed on two signals
- Stoplight system : Yellow – stop and check in , Red – get me down now!!
- Audible red : My partner is gagged under there so the non-spoken version of red is Morse code SOS
Links:
<< add a Shinju off camera. zoom to LeeLee, who gestures to the harness when it is mentioned>>
My partner is sporting a Shinju. This is a great choices for your first suspension, because it is relatively straightforward to tie, quite forgiving and is nicely secure.
Note that her hands are not tied. For the first few times, I recommend they be free during lift and let-down
Seated suspension
<>
Attach hips
- Can use a single half-Tatu hanger here, like this, if we wanted to do just a seated…
- …but we are wanting to go full horizontal after we do the seated version, so I am going to go with a 3pt hanger
Lift to seated
- Here is why I really like the hanger.
- You can tie your support line to the top then come through, but if you start at the bottom, you have three wraps when you start back up, so you are lifting with both your hands.
- A fourth line *might* be helpful in some cases, but each wrap introduces more friction and you start to get diminishing returns…
- Lift, lock with grip, use other hand to munter off, then chain to finish
- <<Pose, spin>>
Can now add bondage to make helpless if you wish
It is perfectly possible for a person to self suspend with these techniques. All of these things can be tied on yourself. And you can suspend yourself!
- <>
- Let say we were in our seated suspension and we wanted to go further.
- Hand break, undo chain, undo munter, lift to full horizontal, lock off
- So a range of possibilities are before us…
<>
Normal let-down. Remove chain to munter + break grip
- To let her down, remove secondary restraints (arm and leg bondage) and secondary lines first.
- If has been horizontal or inverted, lower hips gently and slowly get them to a normal orientation, let the blood flow resume
- leave chest attached. If they have been flying for awhile, the return of normal circulation patterns may cause wooziness, their legs could buckle
- let them stand there for 30-60 seconds and reclaim themselves, then, use the hand break and release the chest line. Support them down to the ground
- check in with them, move them to the side for a moment, clear your space and then take them for aftercare/cooldown/fuck-party whatever you had planned…
<>
Emergencies
- We’ve already talked about a normal let-down, but let’s say something starts going wrong. For example, your partner faints. You need to act now. You need to be familiar with common issues that arise in suspension and how to deal with normal presentations of those case.
- <>
- << show link: /suspension-planning-safety/>>
- For fainting, we need to get them to the ground, face up and raise their legs 12” (30 cm) above their heart.
- If you have a safety munter in place, this is pretty straightforward. Use it!!!
- << pull chain stitch, LeeLee “faints”>>
- Lower your partner smoothly, watching out for their head.
- You may need to cut any ropes that prevent them from laying flat on the floor. Using the safety munter will typically limit the number of ropes you need to cut, perhaps none, but still, be ready to do so. Do not hesitate. Ropes are replaceable, people aren’t.
- <>
- The first time something unplanned happens, it is scary, but with planning and practice, you can handle it smoothly and calmly. Read through the suspension safety page and supplement that with your own research and study.
So you have now entered the world of suspension! Congratulations! I hope you have fun in this new dimension! My partner today is leelee Cocodrie . I am Lazarus Redmayne, and this TheDuchy.com
If you learned a little something, consider supporting us on: patreon.com/theduchy