
Building Blocks - Simple Strap Nodes
By Lazarus Redmayne
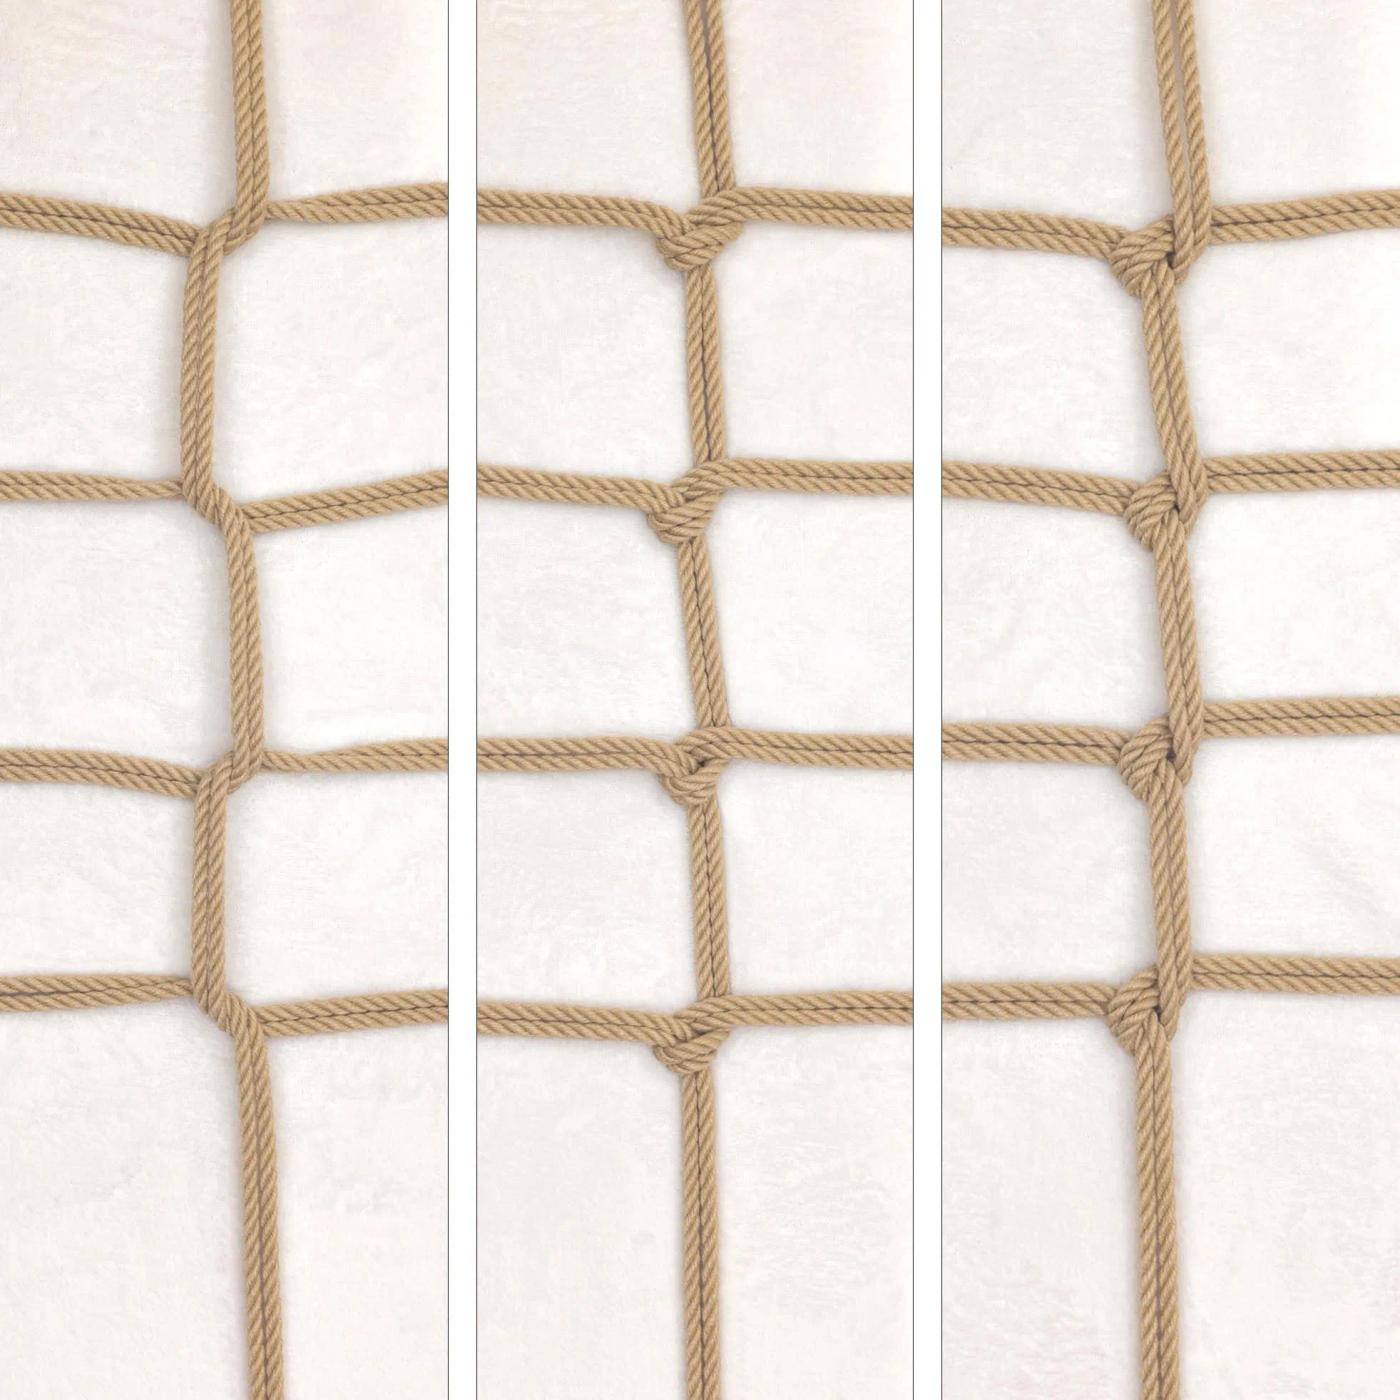
Here are three common approaches to creating nodes when making simple, one-wrap straps … and why you might choose one over another. There are differences in speed, appearance and relative security.
In all of the scenarios below, we are tying a series of one-wrap straps, running from the bottom of the screen to the top. You might do this for a mermaid tail, for example, or a sleep sack … or many other possible scenarios. You can also do this running downward just as easily as moving upward; you should practice both.
Rope Needed
For this tutorial, I used one 30' (~9m) piece of Natural 1/4" (6mm) hemp.
I use an amazing Natural hemp rope provided by my affiliate Twisted Monk. Check them out!
Video
Video Contents:
- Option 1 – Continuous Reverse Tension (0:32)
- Issues with Option 1 (3:00)
- Option 2 – Half Hitch, Under Stem (3:34)
- Benefits and Issues with Option 2 (5:10)
- Option 3 – Half Hitch, Over Stem (5:42)
- Benefits and Issues with Option 3 (7:12)
Option 1 – Continuous Reverse Tension
This option is the fastest, but least secure. It is also less regular or symmetrical in appearance.
Run your rope up to the point you want your strap. Then run it around the thing(s) you are tying. Reach under the center line (“stem”) and hook the tail
Bring the tail under the stem…
…then slightly reverse tension and bring it up toward the place you want to do your next wrap.
Because this technique relies on reverse tension to hold the prior node tight, you will have to make each wrap run the opposite direction as the wrap before it. So, as our first wrap went left in this example, our second will need to go right.
Take a moment to adjust the tension in that first wrap.
Wrap around, this time going the opposite direction from your last wrap.
Again, reach under the stem and grab the tail.
Pull the tail under the stem.
Then reverse the tension and bring it up toward the place you want to do your next wrap.
Repeat as often as you wish.
Note that this version looks a bit asymmetrical. This can be reduced somewhat by making sure the lines go into and exit each node in the same way every time, but this effect cannot be eliminated entirely. If you want something more symmetrical, try Options 2 and 3.
This version is fast, but it has a problem: These nodes have almost no friction to hold them in place. Therefore, this version can work well if your partner is going to be in a situation where they will not be able to move much and cannot reach these nodes.
If they can move a bit, or if they can reach the nodes, the lines are quite easy to move around.
This can result in greater spacing between your wraps and more freedom of movement than you intend.
Let’s see if we can improve on that!
Option 2 – Half Hitch, Under Stem
This option is the slowest of the three we discuss here but it is still quite fast. It is also the most secure and features a regular, symmetrical appearance. This is the one I tend to use the most.
Do all the same things you did for Option 1, Steps 1-3.
But this time, after you have adjusted the tension in your wrap, bring the tail down to a point below the wrap, keeping tension on the tail so that it does not loosen.
Now, using your other hand, reach under the wrap from above, on the same side as the tail. Hook the tail.
Pull it under the wrap and up, maintaining the tension as you go. You have just formed a Half Hitch.
Unlike Option 1, with this version, you need to make the second and subsequent wraps go the same direction as the first in order to maintain the tension on the node and keep the prior wrap tight and in place.
Wrap the tail around and complete the second wrap Half Hitch just as you did the first.
Repeat as many time as you wish.
Done!
This version has an advantage for Option 1 in that these Half Hitches have a better grip (more friction) on the stem. This makes this version more secure. Also, because the wraps go the same way every time, the result looks more regular and symmetrical. This version has one disadvantage: It requires two tail pulls instead of one. This makes it a little slower, although not too much.
Option 3 – Half Hitch, Over Stem
The Over-Stem Half Hitch is a nice balance of the two. It is almost as fast as Option 1, having only one tail pull, and features a regular, symmetric appearance. It is marginally less secure in that there is a little less friction holding the stem in place.
Here is how to achieve a Half Hitch with one tail pull instead of two!
Lay the tail *over* the stem, instead of going underneath it like we often do.
Reach under the stem from below the wrap as shown. Hook the tail.
Pull the tail under the stem.
Adjust the location and lay of the wrap.
Tighten the wrap to the desired level.
Then simply lay the tail on top of the wrap.
Like Option 2, do the second and subsequent wraps in the same direction you did the first for a nice, symmetrical result.
Like this.
Done!
While this looks almost identical to Option 2 and is a bit faster, it can be argued that that it is marginally less secure. The reason is that the stem is being held up away from the thing being tied instead of being held against it. This means there is less friction holding things in place. In practical terms, however, it usually makes little difference. If you are binding two legs together using this technique, for example, the stem will usually be between the legs and therefore not against the skin anyway. As such, it usually comes down to which you prefer for speed and appearance.
Comments
Loading comments...
Sign in to leave a comment.