
Door Anchors
By Lazarus Redmayne
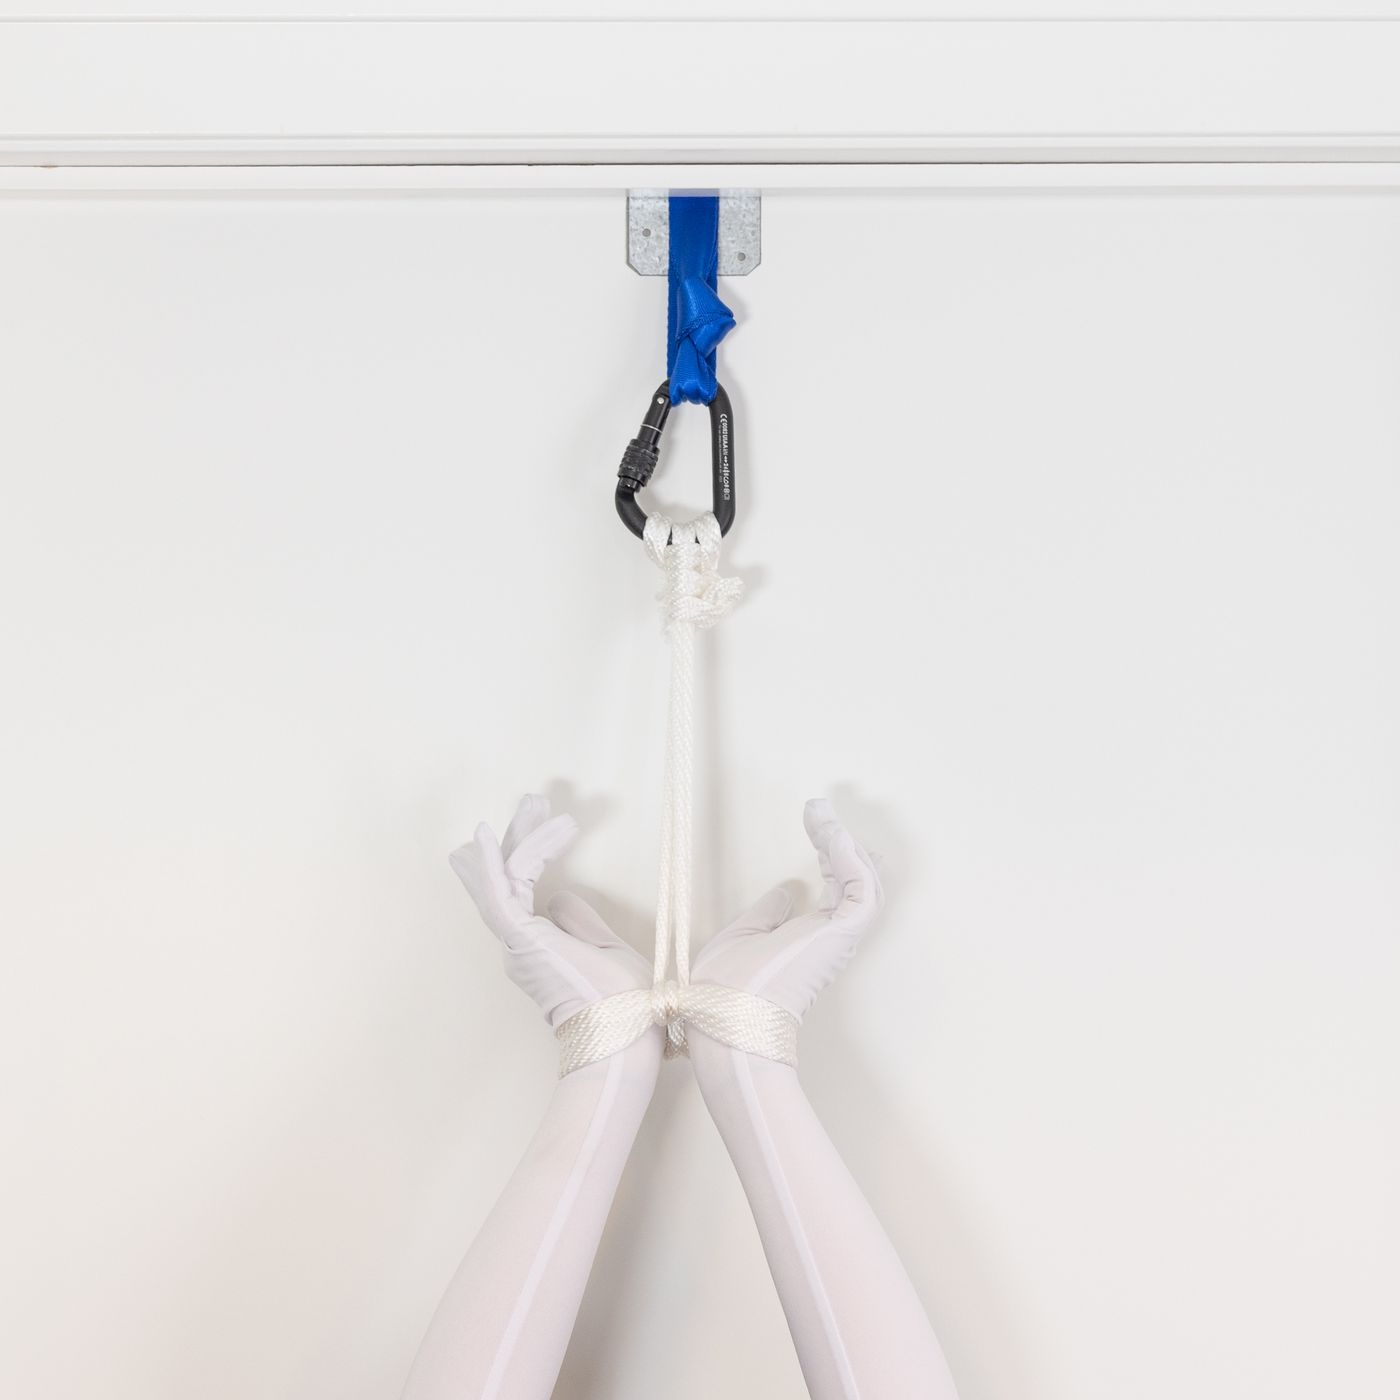
There are many ways to create an improvised door anchor point. All you need is a strong door and a single piece of rope, a thin towel or some tubular webbing. You can optionally add a toggle and a carabiner or ring to make the anchor even better. Below, I will show you a few quick options, plus one that you can make beforehand and keep in your toy bag.
Be realistic. A door anchor is not a full hard point; it is not normally strong enough to suspend a person‘s full weight. (Yes, as with everything, there are exceptions to this statement, but they are very dependent on the situation.) But assuming the door is strong and latches well, a door anchor is usually sufficient to hold things within reasonable limits. It can be used to tie hands up over head, do a strappado and other such situations where you need to attach to a point higher up and have no other good options!
Risk Management and Safety
Reiteration of the standard disclaimer: As with everything else on this site, you assume all risks associated with trying to implement any of these ideas in real life.
This is general conceptual advice about things that may or may not work in your specific situation. While these ideas have worked very well for many people, they may not work for you. You are responsible for any issues or damage or injury that may result from attempting to realize these ideas. Go slowly. Test things out. Make sure they work the way you intend. Have backups for your backups. Always be more than one failure away from disaster.
Video
Video Contents:
- Important Context:
- Overview of Concepts (0:17)
- Doors Themselves (1:47)
- Door Anchors:
- Example 1: Rope Only, Locked with Square Knot (3:05)
- Example 2: Rope Only, Locked with Fisherman’s Knot (6:04)
- Example 3: Paracord … A version that can be created before you need it (7:56)
- Example 4: Climbing Loop … A cool way with clean lines (12:06)
- Example 5: Tubular Webbing or a Flat Strap, Locked with a Water Knot (15:18)
The General Structure of a Door Anchor
Door anchors usually have three parts:
Some closed loop that goes over top of the door. There are many materials and techniques that can work for this. I will keep changing them up below so you can see various options!
Something to keep the door anchored the anchor from sliding through the door frame. The general term for this is a “toggle“.
You can use a hank of rope, a wooden dowel, a pencil, a rolled up washcloth … almost anything will work.
(Optional) And usually, there’s some kind of hard elements like a ring or carabiner for the rope to slide through.
This just keeps the supporting lines from being pulled through the door frame. You can use almost anything that is won’t squish down and is over a centimeter half an inch wide. Hoping parentheses often even less we do, but this is a good rule of thumb.
Let’s talk about doors themselves…
Be respectful. Don’t damage someone else’s property.
- If it’s not your door, don’t damage it. You’re not the one paying to fix it.
- If it’s your door, do whatever the hell you want…
- …although if that’s the case, probably just install a regular hard point someplace. You can camouflage it by hanging a decently sized potted plant on it or a punching bag, etc.
Most doors are just polite requests …
Only do this with strong doors. Do not attempt with a door that feels light, cheap, hollow, etc.
Most doors are just polite requests. If the door frame is wood, there is maybe 1 - 1.5 cm of wood preventing that door from opening. This is even worse with newer construction; that wood is likely some much softer, weaker variety. A frame like this cannot take a great deal of impact or stress; it will not withstand someone bashing against the door with their full weight. The latch can pretty easily just rip the strike plate right out of the door frame. If your partner wants to fight and thrash, do that kind of scene a different way or another time. You don’t want to risk breaking the door frame; that kind of damage is expensive to repair. Steel doors with steel frames are obviously much stronger, but also much less common.
But if you have a strong, solid door that firmly latches this should work well.
But/also…
Protect the door!
We will demonstrate this on a plank.
Even with the lines flat and orderly across the top of the door, if your partner pulls hard on that anchor…
…it could mark the top of the door. If the door isn’t yours, be respectful and protect it.
One way is to put a thin washcloth or something soft over top of the door…
…to distribute the force a little. It’s not great, but it’s better than nothing.
A little better: Get a thin piece of tough cardboard…
…form it to the door…
…and use that. That will distribute the force better.
If you think you might be doing this a lot and want to have an even stronger protection, get a thin metal plate (I got this one for $3 at a local hardware store)
…and a little duct tape.
Add the duct tape to the inside of the bracket to protect the door from the metal…
Put the plate in position.
Now any tension put on the rope will be distributed across the entire metal plate. This has a much lower risk of damaging the door.
Create an orderly loop, then lock it off (Rope Only)
This is ¼” (6mm) rope. It may not work with tightly fitted doors. For that, try paracord or a strap (ideas below).
You can use a single piece of rope. This one is 6-7’ long.
Start making a loop.
Typically you’ll want loops a minimum of 6–7 inches.
Continue making neatly-organized loops until you have at least six strands coming away from the bottom. Arrange your lines so that you have equal length tails on the top.
Double check that you have loops are all the same size.
Pick the loops up and begin forming a Square Knot.
When making the first half of the Square Knot, run one of the lines underneath all the strands of the loop like this.
Then add the second half of the Square Knot …
… and tighten. You should have something like this. Having the strands run through the Square Knot helps to hold them all at the same size.
Now we need to use up the rest of the rope.
Make a Half Hitch around the entire set of lines like this.
Tighten.
If you still have rope left, add a second one.
Tighten.
Repeat on the other side one
Tighten.
These knots are sufficiently bulky that you could use this as the door anchor just as it is.
Like this.
Some people do use it like this, but that is outside my risk profile. There are always ways to add a toggle and I just feel better with one in place. Here I just used another hank of rope as the toggle.
Here’s how you would arrange it on the door with no toggle.
… here I added a cane as a toggle…
… and what it looks like on the door from the anchor side.…
Lock off a loop, then turn it into a small multi-strand loop (Rope + Toggle)
You can see this alternative way to make the loops in the video:
- You can also simply form a loop with rope by using a fisherman‘s not to connect to the end. (Fisherman‘s not is a much more secure way of joining ends than a square knot.)
- Once you have your loop, you can just coil it up and use it just like that to create a door anchor. In this example, I’m putting a cane on one side act as the toggle and then the loops of rope where my finger is could be used as the anchor point.
- But it’s almost always better to use something hard to connect to something soft. So in cases like this, I almost always use a carabiner or suspension ring. Like this.
- Here’s another example where I’m using a dowel instead of a cane as the toggle.
Anchor one end, make loops, anchor other end. (Paracord v1)
Many doors have enough clearance that you can make an anchor with ¼” (6mm) rope, but some doors are tight enough that it won’t work. This is where Paracord can be helpful! It is only 2mm. You can make the loops like I showed you above, but let me show you another way using a Constrictor Knot or Clove Hitch!
This is approximately 6 feet of paracord.
Start with one end.
Connect it to the toggle using a Constrictor Knot.
Run the cord through your carabiner and back around the title.
Set the distance you want, usually a minimum of about 5 inches.
Continue wrapping, keeping your chords nicely in order.
When you get to the end, you need to lock it off.
You can lock off to either side, but mostly for aesthetic reasons, I am going to lock off on the toggle side. Again, use a clove hitch or constrictor not.
Add tension and work the lines so that they all have the same tension and evenly support the carabiner/ring.
This is now ready to go over the door.
Start with bight, series of Cow Hitches (Paracord v2 - Pre-create, use later)
If you think you might be using a door anchor a lot and want to prepare one beforehand and just toss in your toy bag so it will be ready when you need it, you can connect the rope to the toggle a different way:
In this case, find the center bight.
Attach it to the center of the toggle with a Lark Head.
(Optional) for firmer grip, convert the Lark’s head into a Prusik Head. The video or Prusik Head tutorial will show you how, if needed.
Set your ring on top of the tail a minimum of 5 inches away from the toggle.
Pull the tail up through the ring.
Reverse tension and bring the tails back up to the toggle, one on each side of the center.
We are going to do Cow Hitch’s on each side. Do your first tail pole on the side more toward the center.
Complete the Cow Hitch.
Repeat on the other side, again, first tail pull toward the center.
Complete the Cow Hitch. Verifying the tension is the same on both sides.
Flip it over.
Run the tails underneath the ring…
… and then up through the ring.
Reverse tension and bring them back up to the toggle.
Again, do a Cow Hitch, making your first tail pull toward the center.
Complete the Cow Hitch.
Repeat on the other side and verify the tension is the same on all the lines. (Adjust if necessary).
There are several ways to use up remaining cord.
I will use mine up on the toggle…
… by making a series of Half Hitches around the toggle.
Tighten.
Add another one.
Keep going until you’ve run out of cord.
Repeat on the other side.
…
…until you run out of cord there as well.
This is now ready to toss in a bag or to be used.
Reminder: if you’re using a carabiner with a screw lock gate like this one, make sure the gate is pointed down “screw down, so you don’t screw up“.
Make sure the gate is screwed locked.
This is now ready to use.
Position it on the door.
Don’t forget to add a protection for the door. This is more important when using thinner chords as they are more likely to cause damage (the forces concentrated into a smaller area.)
Make sure the chords are flat and neatly organized like this.
This is how it looks when positioned in a door.
Using a Climbing Loop
You could also use a climbing loop.
This is relatively straightforward to arrange.
In this example I’m using another hank of rope as the toggle.
You can also arrange the ends of the strap climbing loop as Lark‘s heads to better hold onto the toggle. To see a quick and clean way to create this version, check out the video. Here’s how you would arrange it on the door if you were not using a carabiner…
… and with a carabiner.
Note: You want to position the loop junction at some point where the climbing loop is going straight, not where it goes through any sharp curves.
Here’s the toggle side after it has been shut in the door…
…and here is the anchor point side.
Tubular Webbing or a Strong Flat Strap
Tubular webbing is used for climbing and is crazy strong for as thin as it is. Many riggers carry some to connect their ring to a hard point, but short lengths can be used for other things! There are lots of other thin but strong (and tough) straps that can also work.
We need to make a trustworthy closed loop. We will do so with a Water Knot. If your strap is 1” (2.5cm) wide, you need a minimum of about 26 inches. If your strap is wider, you will need it to be longer.
Create a loose Overhand Knot in End 1.
Get End 2.
End 2 is going to create a second Overhand Knot *inside* the Overhand Knot in End 1, by follow the path through the knot. So: End 2 is going into the knot where the End 1 comes out.
Pull enough of the strap through to complete the knot.
Continuing to follow the path of End 1 around…
…under…
…and now bending the line, and tuck it through and underneath both wraps that you can see there on the left side of the knot…
…like this. That’s the shape of the Water Knot.
I like to shape the straps into a little bit of a U-shaped here coming out of the water knot before I work to tighten it.
You want this very tight. Pull on the knot from one side...
…then on the other.
Then grab both straps and pull very firmly apart like this.
That should get nice and firmly seated.
That is the Water Knot from the top…
…and from the side. This is a very reliable way of creating a closed loop when you have some flat material.
Now we’ve added the toggle and the carabiner, and this is ready to use. Position the Knot close to the carabiner so it doesn’t damage the door.
This is how we would position it over the door if using it without the carabiner…
…and with a carabiner.
Here is what it looks like in a door, from the toggle side…
…and from the anchor side.
Scarf, thin towel, etc.
You can also use bundled fabric as long as it is (1) thin enough to fit between the door and frame, while also being (2) tough to support the load. Some kinds of silk scarves can work, some types of towels, but certainly not all. You need to judge for yourself in your specific circumstance.
Let’s do this with a scarf.
You want something strong and not stretchy.
Lay it out flat.
Fold it in half…
…or in thirds if that is not too bulky for the door, then bring in the ends together.
Lay them on top of each other.
I *don’t* recommend using an Overhand Knot like this.
Once tension is added, and knot gets tightened…
… Like this.…
… It can jam and become very difficult to untie. This is particularly true of fabrics like silk.
Therefore, I recommend using a Figure-8 Knot instead.
Bring the tail up at a bit of an angle.
Run it behind.
And then on top of the tail like this.
Then reached through the fold.
To grab the tail.
And pull it through like this. You can add tension to it again to lock the knot.
That is a Figure-8 Knot. It can still become quite tight. But is usually easier to untie under the same conditions than an Overhand Knot would be.
Run a carabiner through the loop and this is ready to be used as your door anchor. As this is already a very soft and forgiving material, you may not need to protect the door quite as much.
Comments
Loading comments...
Sign in to leave a comment.